Beauty and the Beast Mickey Ears Disney Ornament Craft
Beauty and the Beast Mickey Ears Disney Ornament Craft
Check out this great Beauty and the Beast Mickey Ears Disney Ornament craft. This ornament set would be a super fun and festive addition to your Christmas tree this year!
It’s the tale as old as time, right? Beauty and the Beast is one of the most magical Disney tales ever told. Seriously, I was 18 when Beauty and the Beast was released, and I immediately wanted to be Belle.
We love Disney princesses in our house and I can’t think of a better way to combine Christmas love and Disney love than by making Disney-inspired Christmas ornaments. This Beauty and the Beast Mickey Ears Disney Ornament craft is pretty fantastic and I think your kids would love having this reminder of Disney magic on the Christmas tree every year!
Check out this craft tutorial below!
Sunshine Whispers participates in the Amazon Associates and Amazon Influencer Programs. As an Amazon Associate we earn from qualifying purchases. We may earn money or products from the companies mentioned on this site and in this post.
Beauty and the Beast Mickey Ears Ornament Crafts: Belle
What You Will Need:
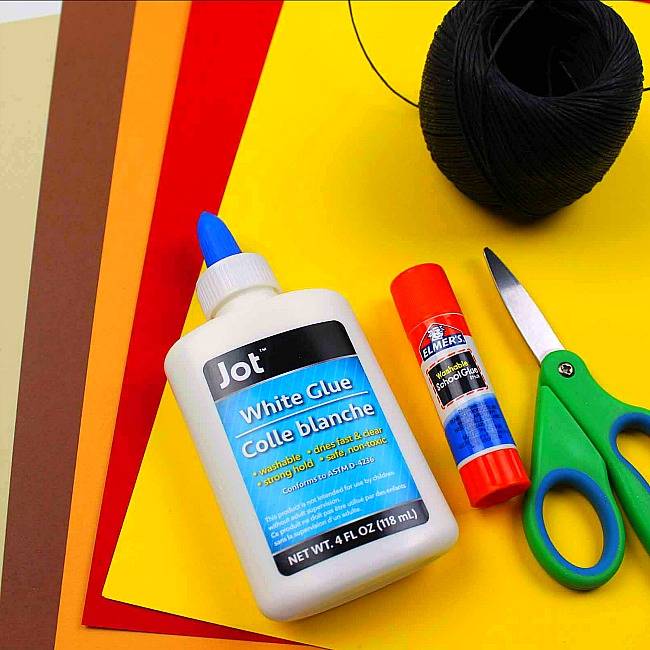
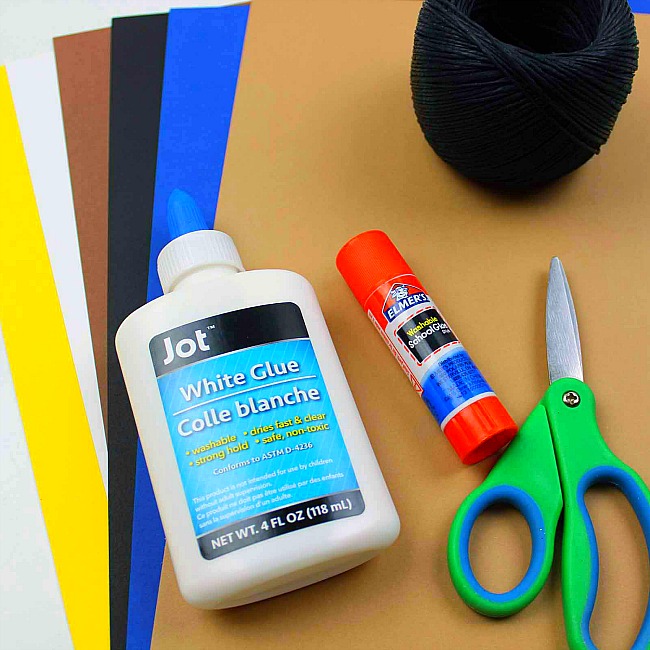
- Cardstock or Construction Paper (cardstock would be better because it is a heavier material). For Belle, you need the following colors: brown, red, tan or peach, bright yellow, and orange (pumpkin orange or mustard yellow)
- Glue stick (like kids use in school)
- White school glue (like Elmer’s glue)
- Optional: paper plate or small tray, paintbrush
- Optional: Black marker or sharpie (for tracing)
- Scissors with sharp edges (so, adult scissors, not kid scissors)
- Glitter in the following colors: red and gold
- Red Glitter Glue pen
- String or Ribbon; preferably a basic color like black or white.
- Beauty and the Beast Ornament Craft Template (download here)
How to Make the Beauty and the Beast Ornament: Belle
- Download and print out the Belle Mickey Head ornament template. Before you print, check out the instructions on the PDF download. If you choose, you can print each page of the template out on the corresponding color for each of the different parts of Belle’s dress.
- Alternative: You could also print out the PDF template on white paper. Then cut all the pieces out, trace them on the color paper needed, and then cut them out again. This method does involve more steps (and twice as much cutting), but if you can’t figure out how to print the template one page at a time on colored cardstock, this might be an easier option for you. (to be fair, that’s the option I choose. ha!)
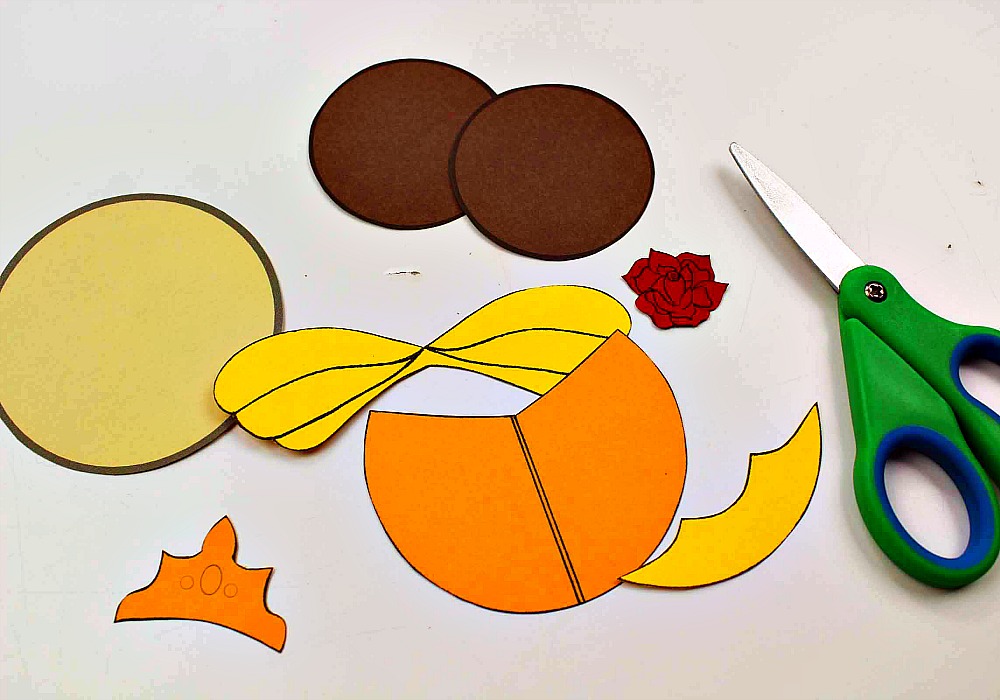
Once you have cut out all the pieces set them aside.
Now let’s start assembling the Belle ornament!
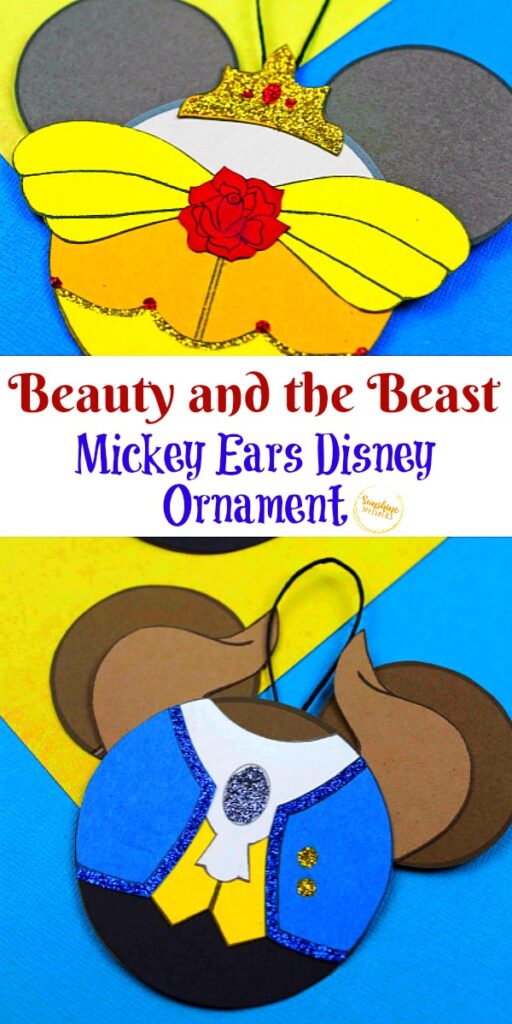
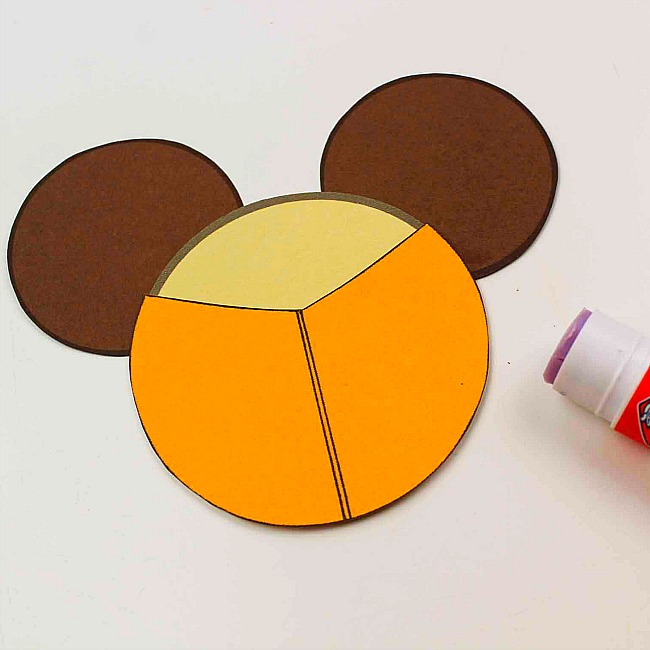
First, take the two smaller brown circles and glue them to the back of the larger tan or peach circle. These are the Mickey Ears. You might want to use the Elmer’s glue (as opposed to the glue stick) for this step… just to ensure the ears stay stuck.
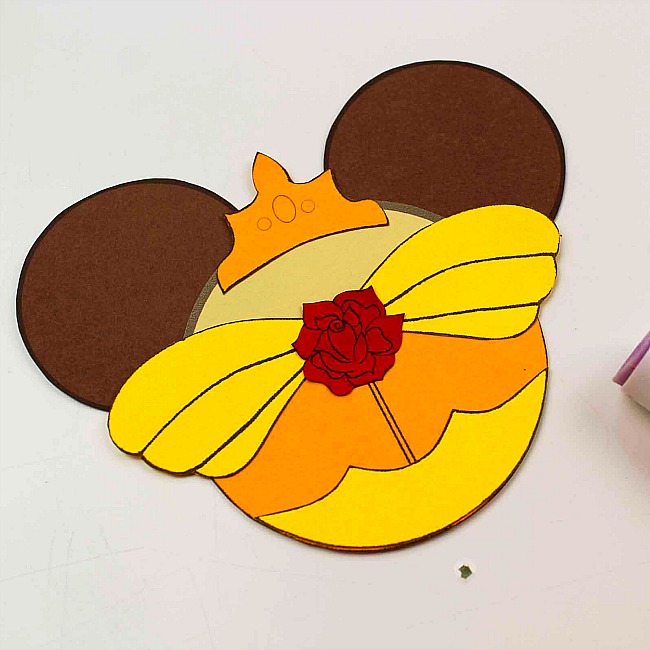
Then glue the mustard orange dress piece and glue it to the bottom of the tan/peach circle.
Next, glue the bright yellow pieces of the bodice to the top and bottom of the mustard orange dress piece.
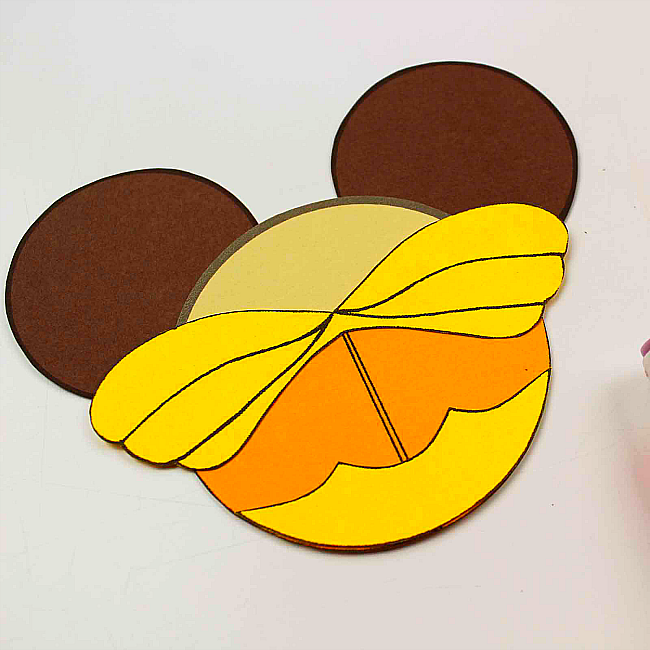 Add the crown and rose to the dress next.
Glitter adding tips!
Add glitter! So, there are two options with the glitter. You could glitter your pieces before you glue them together or you could glitter your pieces after the cardstock elements are already glued together. Either way, you will want the glitter to dry completely before you move onto the next step.
Pro tip: You don’t want to use too much glue or the glitter will be clumpy. You also don’t want to use too little glue or the glitter will not stick to the cardstock evenly. Definitely use Elmer’s glue (or glue like that). Best crafting practice: squirt glue onto a plate or tray and then use a small paintbrush to paint the area you want to add glitter to.
Then, sprinkle the glitter onto the area, shake off the excess, and let it dry.
For Belle, add gold glitter to the corwn and dress edging as shown below. Once the gold glitter dries, use the red glitter pen to add flower details to the dress edging, as well as the jewels on Belle’s crown.
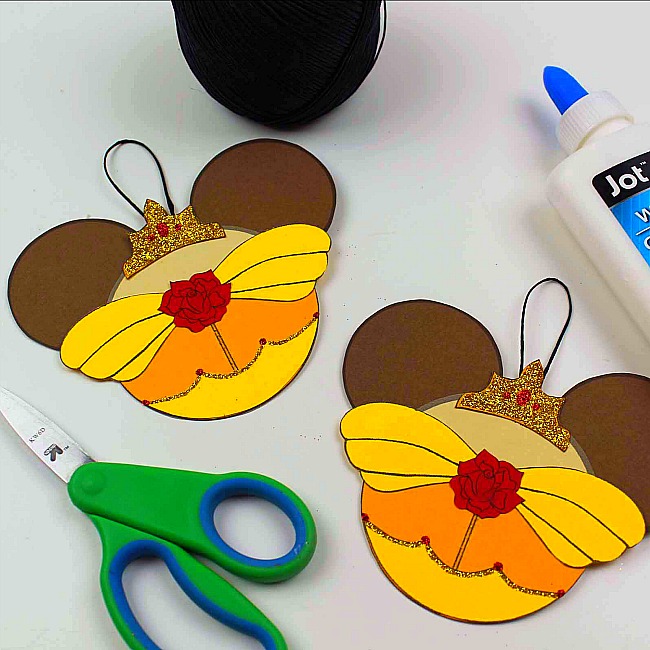
Finally, flip over the ornament and add a bit of white school glue to the back. Loop a piece of string or ribbon and glue in place.
Allow the glue to dry completely.
Beauty and the Beast Mickey Ears Ornament Crafts: Beast
What You Will Need:
- Cardstock or Construction Paper (cardstock would be better because it is a heavier material). For Beast, you need the following colors: white, yellow, black, blue, dark brown, and light brown.
- Glue stick (like kids use in school)
- White school glue (like Elmer’s glue)
- Optional: paper plate or small tray, paintbrush
- Optional: Black marker or sharpie (for tracing)
- Scissors with sharp edges (so, adult scissors, not kid scissors)
- Glitter in the following colors: blue and gold
- String or Ribbon; preferably a basic color like black or white.
- Beauty and the Beast Ornament Craft Template (see below)
How to Make the Beast Ornament:
- Download and print out the Beast Mickey Head ornament template. Before you print, check out the instructions on the PDF download. If you choose, you can print each page of the template out on the corresponding color for each of the different parts of Beast’s suit.
Once you have cut out all the pieces set them aside.
Now let’s start assembling the Beast ornament!
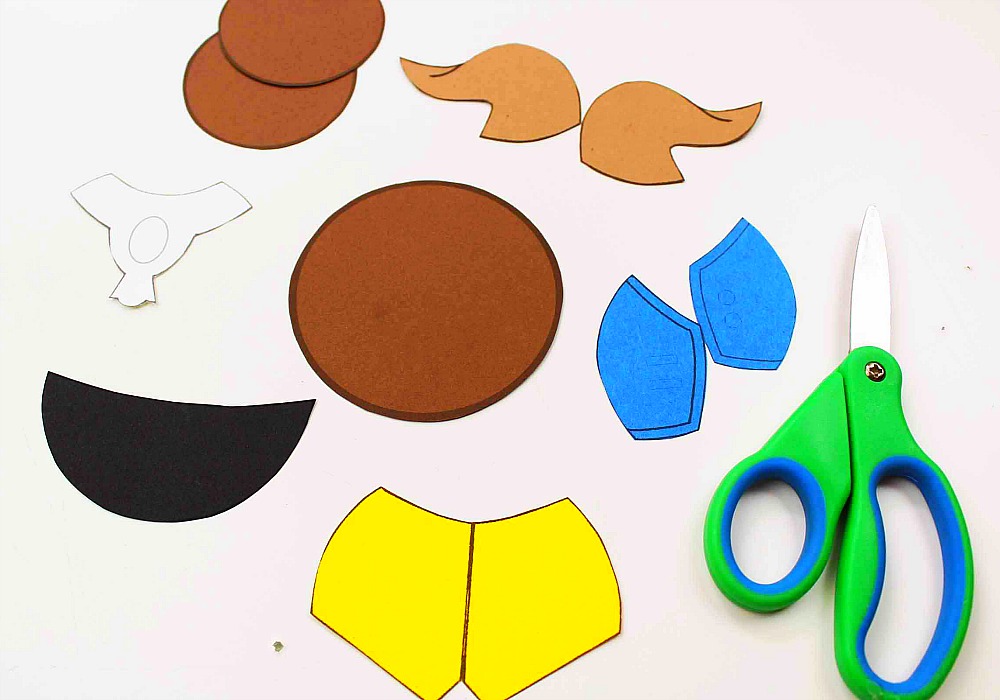
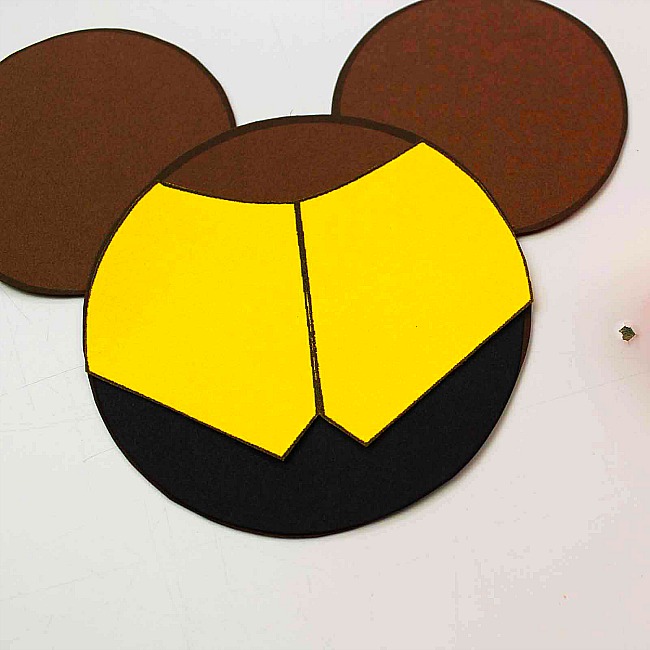
First, take the two smaller dark brown circles and glue them to the back of the larger brown circle. These are the Mickey Ears. You might want to use the Elmer’s glue (as opposed to the glue stick) for this step… just to ensure the ears stay stuck.
Next, glue Beast’s black pants and yellow vest to the brown base as shown below.
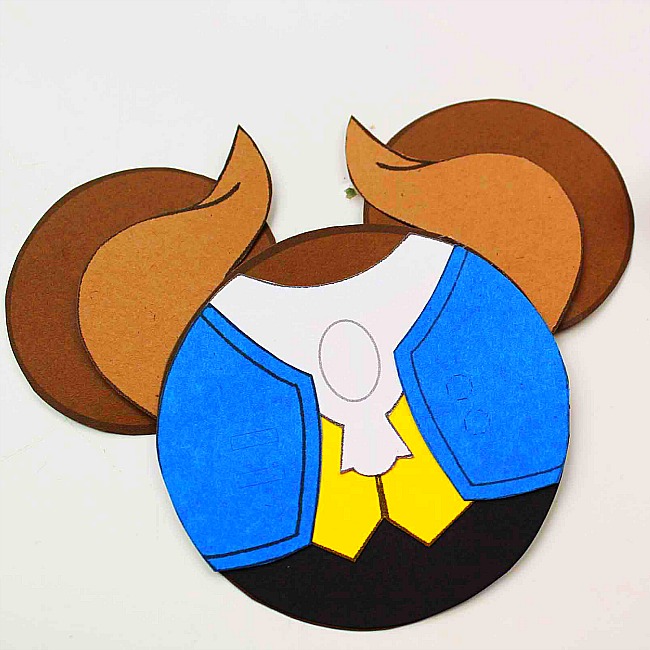
After Beast’s pants and vest are dry, glue on the white shirt, blue jacket, and the light brown fur pieces onto the Mickey Ears as shown below.
Glitter adding tips!
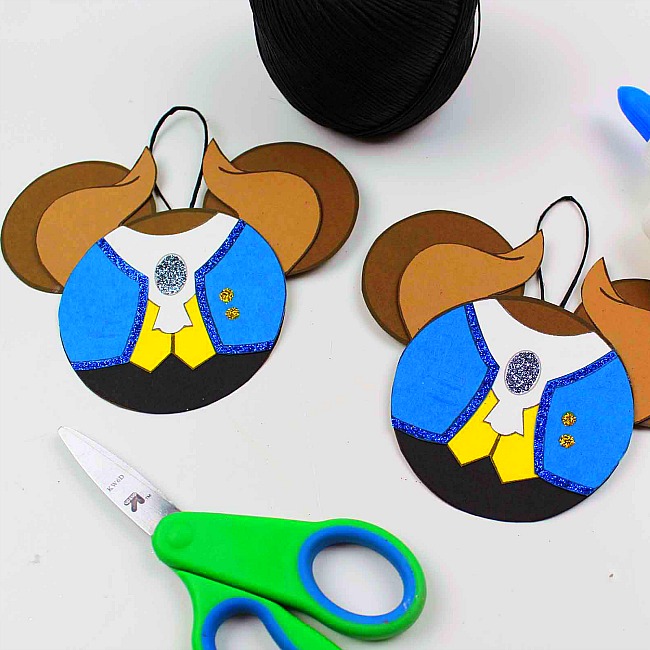
Add glitter! So, there are two options with the glitter. You could glitter your pieces before you glue them together or you could glitter your pieces after the cardstock elements are already glued together. Either way, you will want the glitter to dry completely before you move onto the next step. Use the same glitter pro-tips as provided with the Belle ornament above.
For Beast, add blue glitter to the edges of Beast’s jacket and the medallion on his shirt. Then, add gold glitter to the medals on Beast’s jacket.
Finally, flip over the ornament and add a bit of white school glue to the back. Loop a piece of string or ribbon and glue in place.
Allow the glue to dry completely.
Aren’t these Beauty and the Beast ornaments spectacular?
Christmas Traditions Your Family Will Cherish
Christmas traditions are some of the most powerful bonding opportunities for your family. I know the memories I made as a kid at Christmas-time are a strong anchor for me as an adult.
There are so many ideas though. It’s hard to keep track, isn’t it? Well, these Christmas family traditions are fantastic. Hope you like these ideas!
- Throw a North Pole Breakfast for your kids
- Santa official nice list certificate- FREE Printable
- Take your family on the North Pole Express- FREE Printable
- How to answer the most common questions your kids have about Santa
- Easy ways to help kids in need this Christmas
- 10 Family Bonding activities for the best Christmas ever!
If you loved these Beauty and the Beast Mickey Ears Ornaments, here are More Christmas Ornament Ideas Your Kids Will Love!
- Simple Beaded Wreath Ornament Craft
- Christmas Tree Handprint Ornament
- Easy Cinnamon Ornaments to make with your kids
- Clear Filled Santa Belly Ornament Craft
- Easy Mason Jar Lid Snowman Ornament Craft
- Clear Filled Santa Ornament Craft
- Clear Filled Grinch Ornament Craft
- Christmas Craft Stick Ornaments
- Clear Filled Snowman Ornament Craft