Pumpkin Paper Plate Wreath Craft For Kids
Pumpkin Paper Plate Wreath Craft For Kids
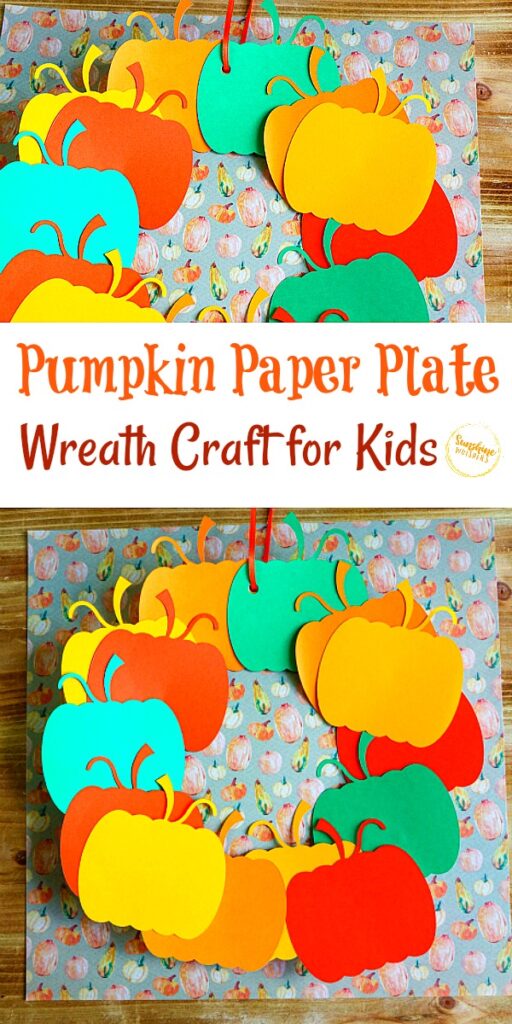
This Pumpkin Paper Plate Wreath Craft for Kids is adorable and really easy to make . A great idea for a fall-themed crafternoon with your kids!
The easiest crafts often are the most adorable. That is certainly the case with this super cute pumpkin paper plate wreath craft for kids. This lovely craft would be perfect to do with your kids on a fall afternoon. You could easily do this craft with a group of kids at a school or daycare.
Older kids will be able to make it fairly quickly. Younger kids might need some help with cutting out the pumpkins. However, this would be a great activity to practice scissor skills!
Sunshine Whispers participates in the Amazon Associates and Amazon Influencer Programs. As an Amazon Associate we earn from qualifying purchases. We may earn money or products from the companies mentioned on this site and in this post.
What you will need:
- Cardstock or construction paper in various shades of orange, red, yellow, and green (this is a good bundle of fall color cardstock)
- Glue dots or glue
- White dinner-size paper plate
- Scissors
- Pencil for tracing the pumpkins
- Pumpkin template printed on cardstock– the color doesn’t matter for the template. (click here to get your FREE template!)
How to Make this Pumpkin Paper Plate Wreath Craft:
1. Print the pumpkin template on cardstock and cut the pumpkin templates out. Older kids can totally handle this cutting job on their own. Younger kids might need some help though, especially with the stem. You really only need one template.
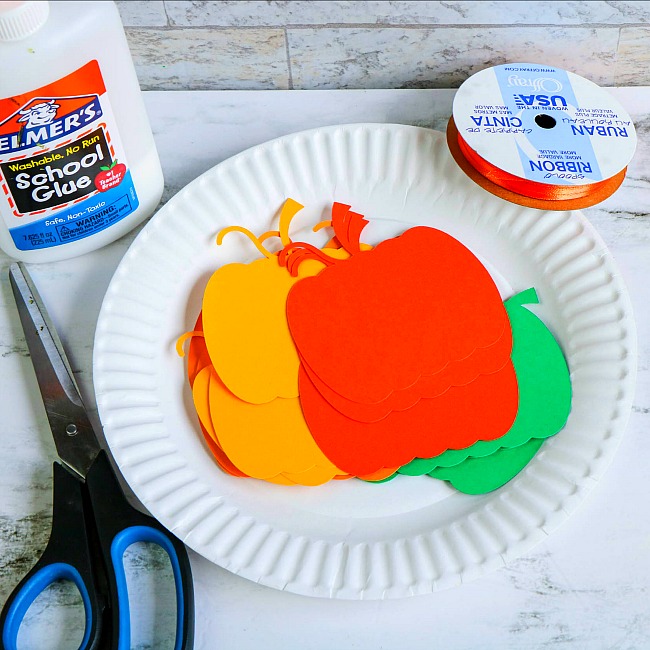
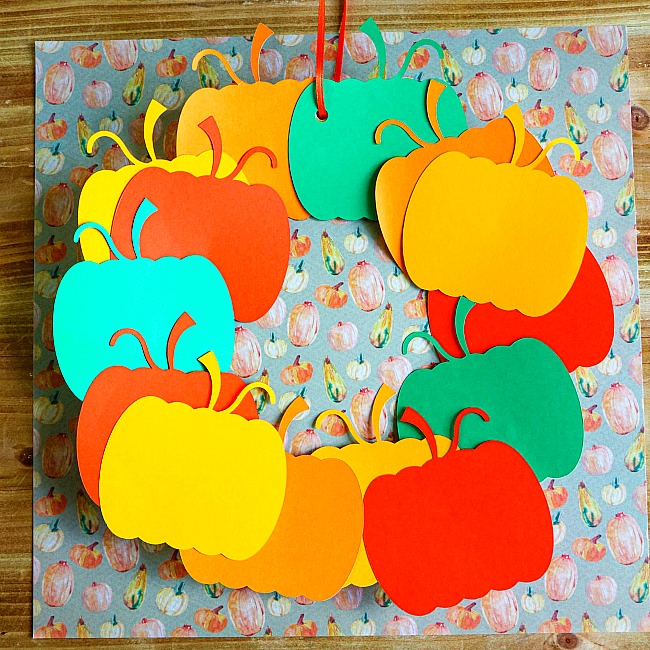
2. Trace pumpkin shapes onto colored construction paper. Cut the pumpkins out. You will probably need 10-15 pumpkins per pumpkin wreath.
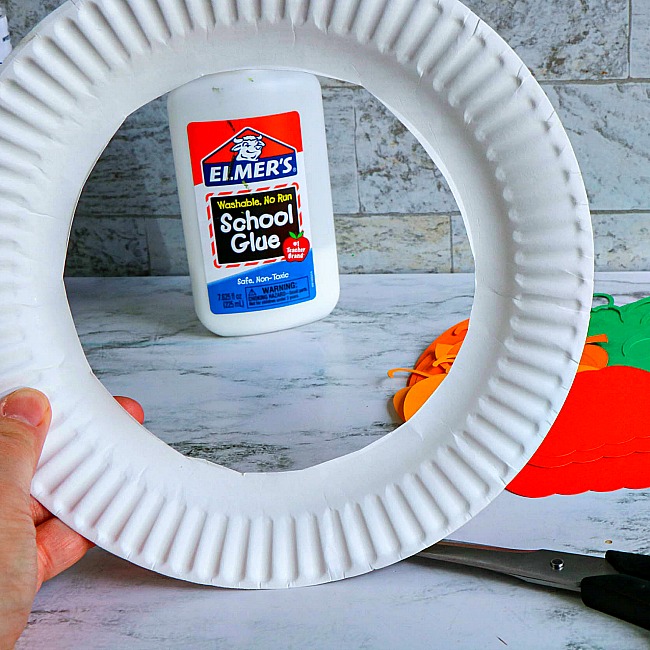
3. Now let’s cut the wreath shape out of the paper plate. Cut the middle out of the paper plate. Ok, it’s really that easy.
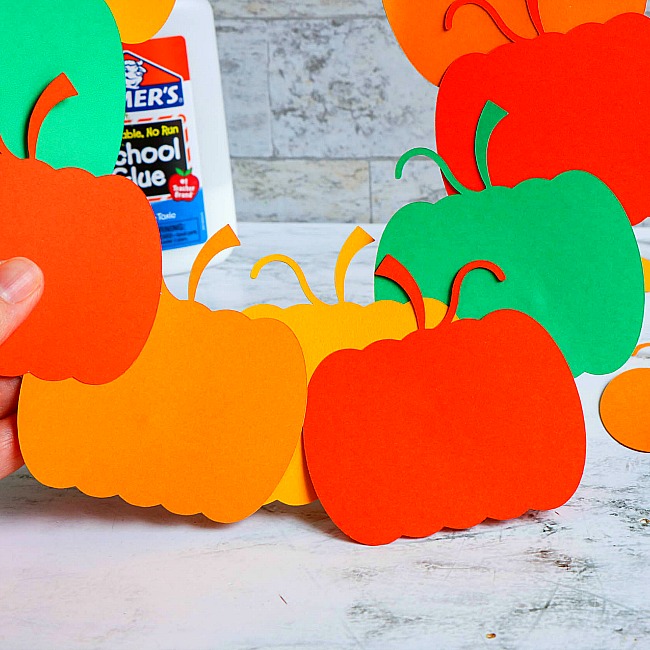
4. Attach the pumpkins to the paper plate wreath using glue dots. Alternatively, you could use glue sticks or Elmer’s glue… although Elmer’s glue might be a little more messy. Glue dots are the perfect material because they create a nice layering effect that makes the pumpkin wreath pop.
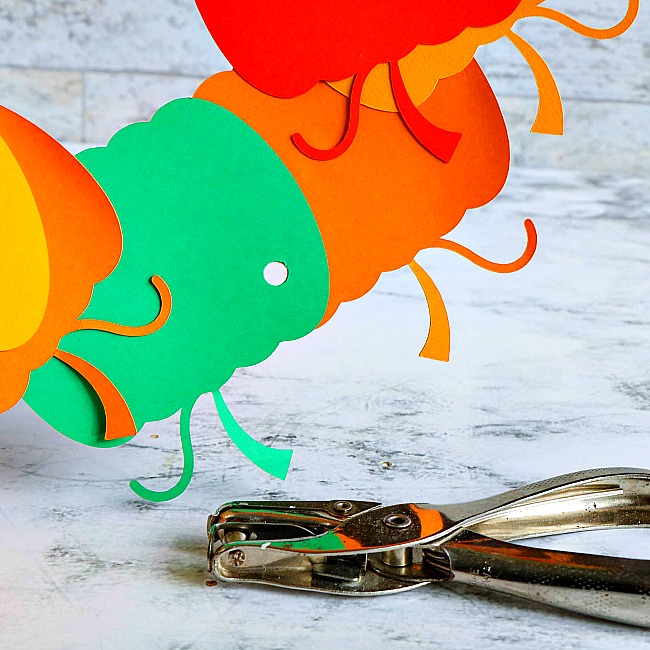
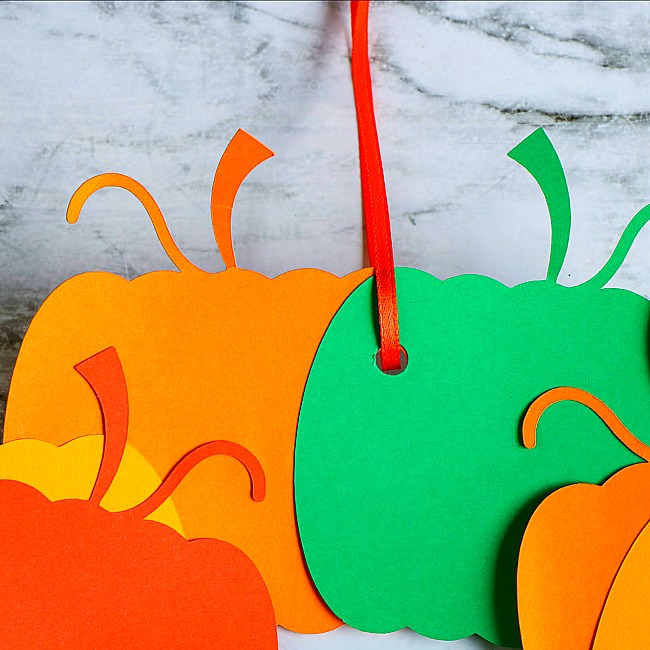
- At the top of the wreath, use a hole-punch to punch 1 hole through the pumpkins.
- Cut a length of ribbon (any pretty Fall-color or themed ribbon would work) for the hanger. The ribbon length can be short or longer depending on where you want to hang the wreath. String the ribbon through the punched hole and then tie a knot.
And there you go! This is a super sweet craft and you could hang it anywhere. Kids might love hanging it on the door to their bedroom, in the kitchen, or even on the front door!
Check Out These Ideas For More Ideas To Enjoy Fall!
- Enjoy the fall season with your family
- Fall family fun bucket list!
- Play this game of Autumn Charades!
- Fall Nature Crafts Your Kids Will Love
- Fall Tree Cork Painting Craft for Kids
- Marbled Paper Fall Leaf Craft for Kids
- Fall Color Stained Glass Craft for Kids
- Best Pumpkin Carving Tips For An Awesome Halloween
- 15 Family Friendly Halloween Movies
- 10 Fun Halloween Traditions To Start With Your Family
- Dollar Store Pumpkin Craft
- Pumpkin Paper Bag Craft for Kids
- Apple Paper Bag Craft for Kids
- Fall Tree Play Doh Activity for Kids