Black Glue Pumpkin Craft For Kids
Black Glue Pumpkin Craft For Kids
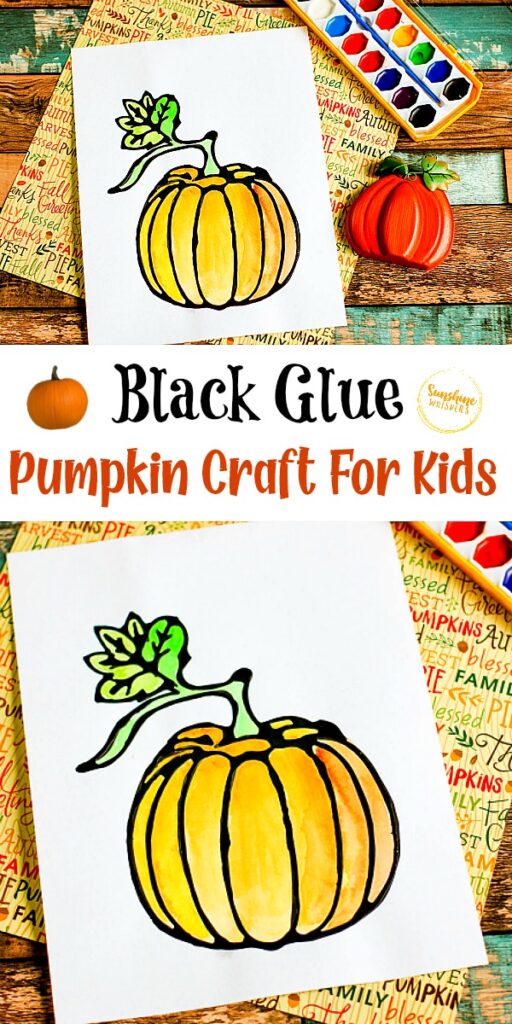
Do you love fall crafting? Check out this amazing Black Glue Pumpkin Craft for Kids because this is such a fun craft technique your kids will love!
If you have never created art using the black glue technique you are really missing you! Black Glue crafts are a ton of fun and and because the black glue created a natural outline, whatever you are painting really pops.
We love Black Glue crafts, so of course we had to try a few fall craft ideas. This black glue pumpkin craft for kids is really sweet and you will have a great time creating it because it’s easy enough for kids but fun for adults too!
Sunshine Whispers participates in the Amazon Associates and Amazon Influencer Programs. As an Amazon Associate we earn from qualifying purchases. We may earn money or products from the companies mentioned on this site and in this post.
What you will need:
- Elmer’s glue
- Black acrylic paint
- Wooden dowel or something to stir with
- White cardstock
- Liquid watercolors
- Paintbrush
- Pumpkin Coloring Pages (FREE Printable Download!)
How to create these adorable Black Glue Pumpkin Crafts!
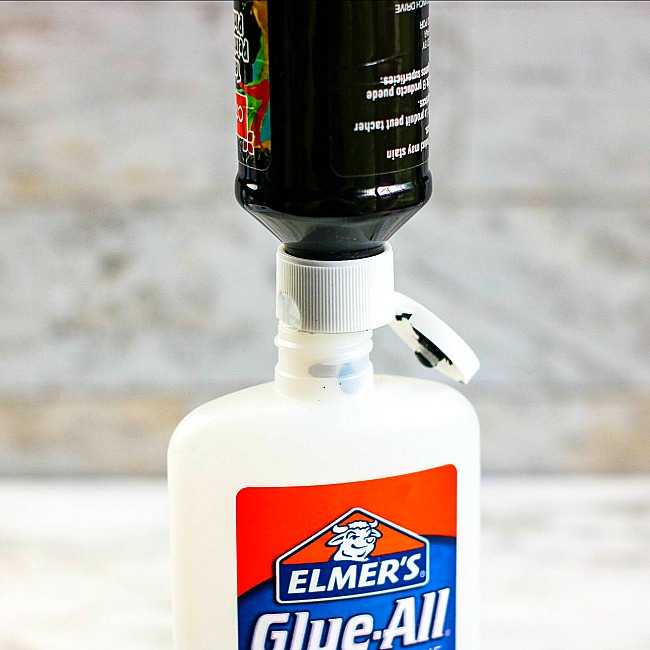
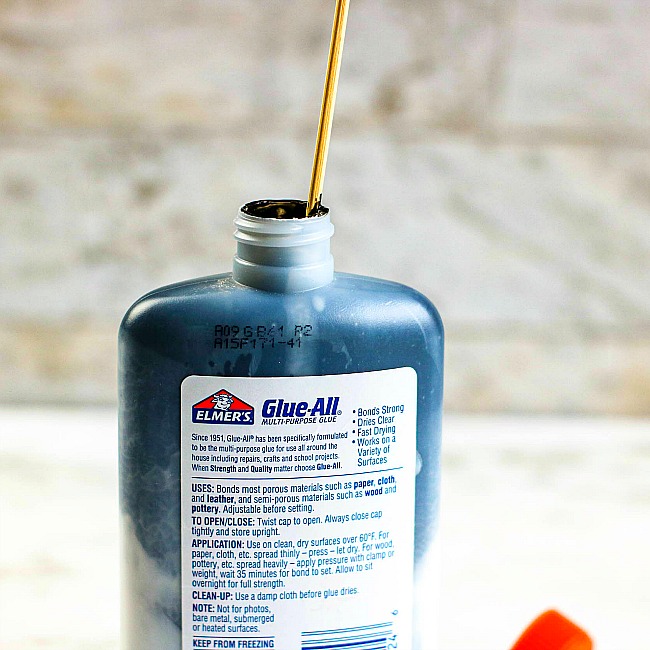
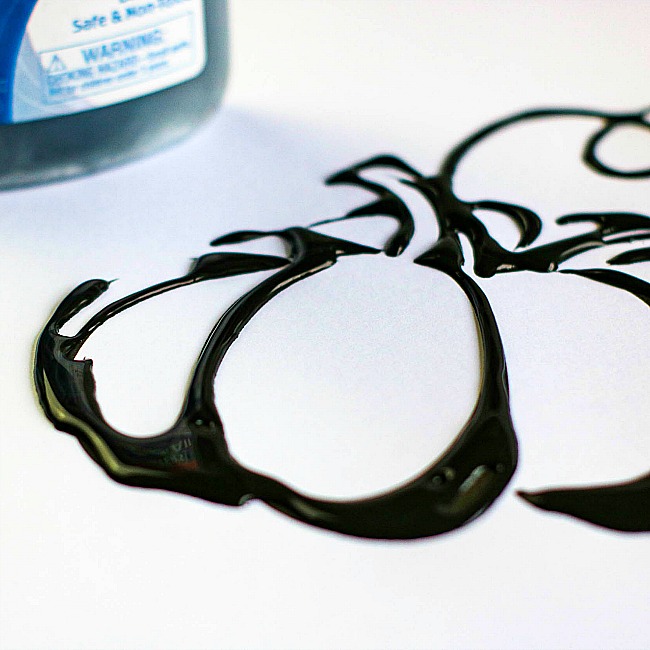
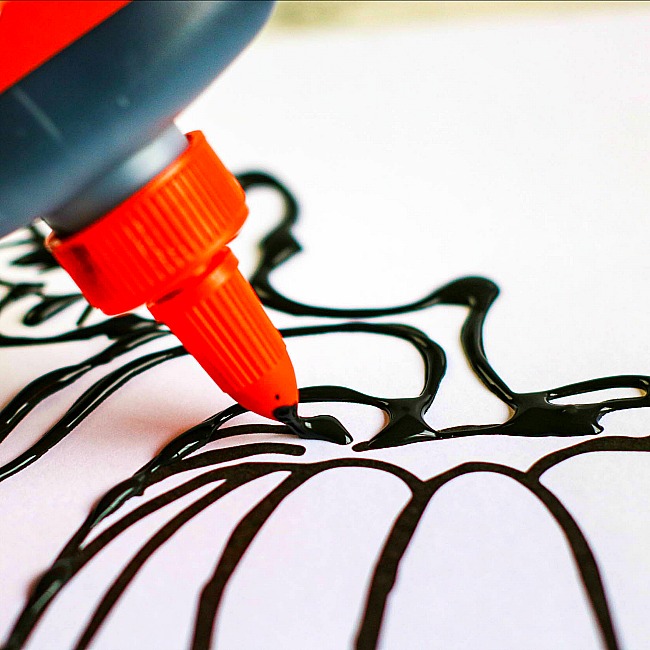
- First, you need to make the black glue! Take the top off of the Elmer’s glue and squirt probably 5 or 6 good squirts of black acrylic paint into the glue bottle. Next, use the dowel or stick to mix the glue and paint together until you have black glue. The more black paint you use, the runnier the paint will be. For best results when tracing lines, test the flow from the nozzle and tighten if needed. If you want a better explanation, check out this very helpful Youtube video:

- After you have made the black glue, print out the coloring pages (download them for FREE here). For best results, your coloring page should be on thick paper, like cardstock.
- Squeeze a little black glue onto a scrap sheet of paper just to make sure the glue is black, not grey.
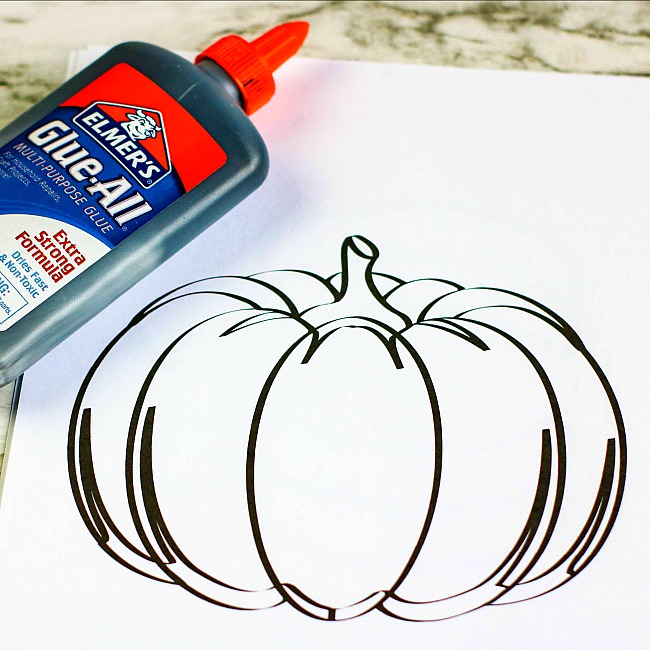
4. With a steady hand, trace the outline of the pumpkin. Don’t worry if the glue is runny or if it pools and obscures some of the drawing details. That is part of the charm of doing black glue crafts. If it is important to you to not have the glue run too much though, use a glue applicator with a finer point nose. And if you don’t like how your first try worked out, then just print out another copy of the coloring pages.
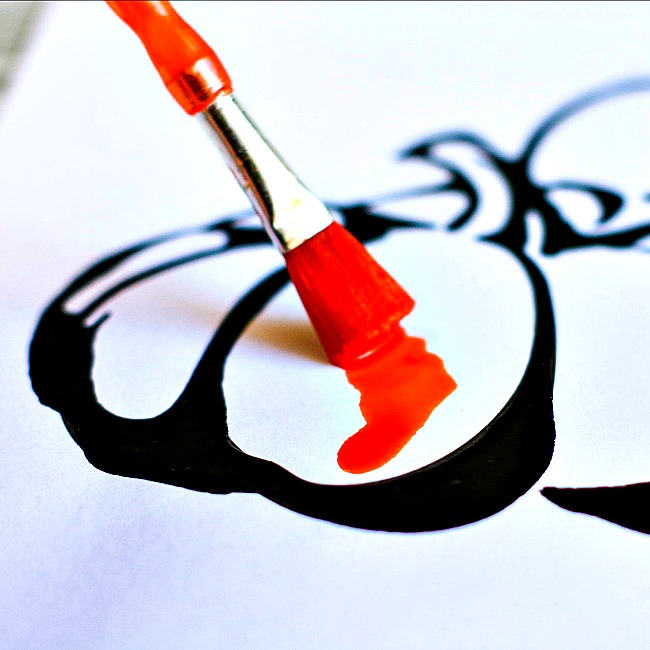
5. Next, allow the glue to dry completely before painting because this might actually take the better part of a day.
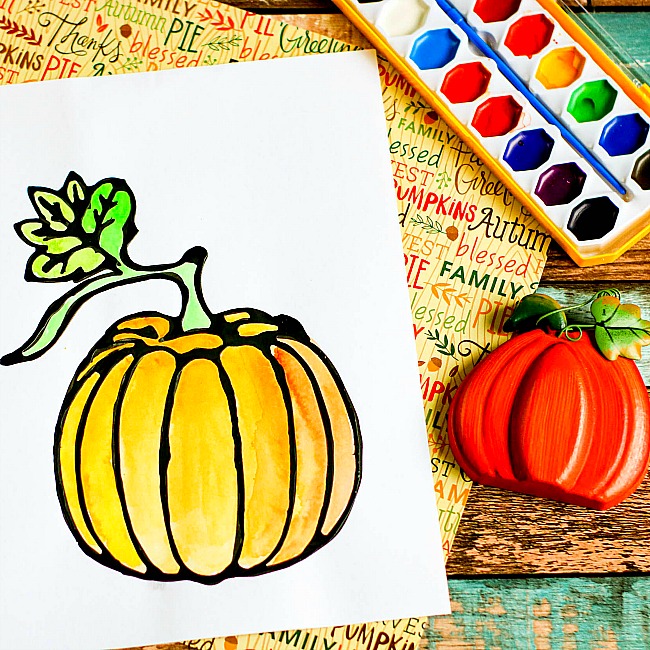
6. Finally, use watercolor paints to complete the picture. I personally find the best way for your black glue artwork to pop is to use liquid watercolors. In fact, they are really fantastic for this type of craft. I used a dollar store ice cube tray as a palette to squirt liquid watercolors into. However, if you don’t want to purchase liquid watercolors, you can also use regular watercolors. This will also help you get a more watercolor-y effect (more subtle colors).
Isn’t this Black Glue Pumpkin Craft so pretty?
Check Out These Ideas For More Ideas To Enjoy Fall!
- Enjoy the fall season with your family
- Fall family fun bucket list!
- DIY Apple Scented Slime
- Play this game of Autumn Charades!
- Make Pumpkin Spice Slime!
- Fall Leaf Play Dough Activity for Kids
- Nature Crafts For Fall Your Kids Will Love
- Fall Tree Cork Painting Craft for Kids
- Marbled Paper Fall Leaf Craft for Kids
- Fall Color Stained Glass Craft for Kids
- Best Pumpkin Carving Tips For An Awesome Halloween
- 15 Family Friendly Halloween Movies
- 10 Fun Halloween Traditions To Start With Your Family
- Dollar Store Pumpkin Craft
- Pumpkin Paper Bag Craft for Kids
- Apple Paper Bag Craft for Kids