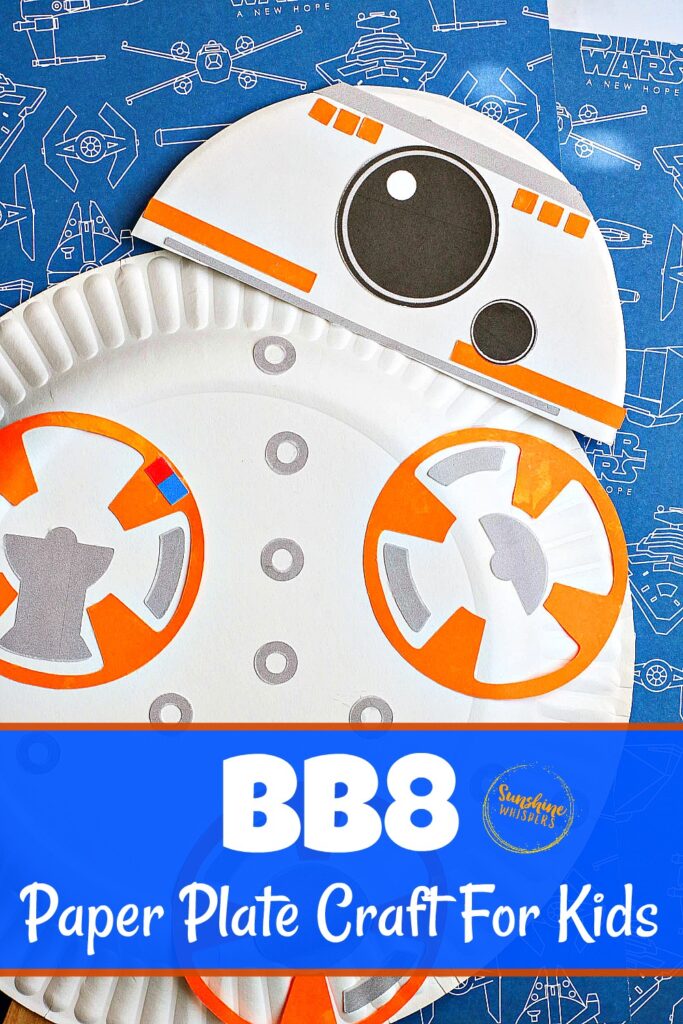
BB8 Paper Plate Craft For Kids
BB8 Paper Plate Craft for Kids
This BB8 Paper Plate Craft for Kids is the perfect Star Wars craft to do with kids to celebrate May the 4th, a trip to Disney, or any Star Wars themed event!
So, if you grew up with R2D2 and C3P0, BB8 isn’t exactly the best droid ever (my Gen X bias is showing. Ha!). But he is pretty cute in his own right. BB8 is certainly no Jar Jar Binks (funny how no one makes paper plate crafts for Jar Jar Binks).
If one droid was going to steal the show for the last three movies in the Star Wars Saga, BB8 pretty much does that. He is really quite adorable for a droid… and the grand finale of the Skywalker years would not have been the same without him.
This BB8 Paper Plate Craft for Kids is really super adorable and very easy to make with your kids.. even younger kids. This would be a great craft to do to celebrate Star Wars Day (May the 4th), a trip to Disney, or really any occasion where Star Wars is the main event!
Sunshine Whispers participates in the Amazon Associates and Amazon Influencer Programs. As an Amazon Associate we earn from qualifying purchases. We may earn money or products from the companies mentioned on this site and in this post.
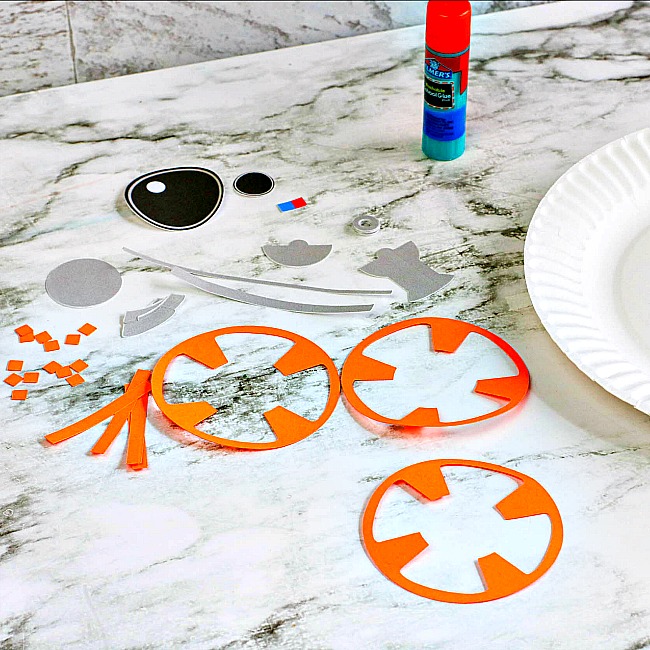
What you will need:
- 2 paper plates (per project)
- Glue (either a glue stick or Elmer’s glue would work fine)
- Scissors
- Popsicle stick or craft stick if you want to turn BB8 into a Star Wars Puppet
- Printable BB8 Paper Plate craft template (click here to download now for free)
How to Make the BB8 Paper Plate Craft for Kids
- Print out the BB8 craft template (click here to download now for FREE). Cut out all the pieces.
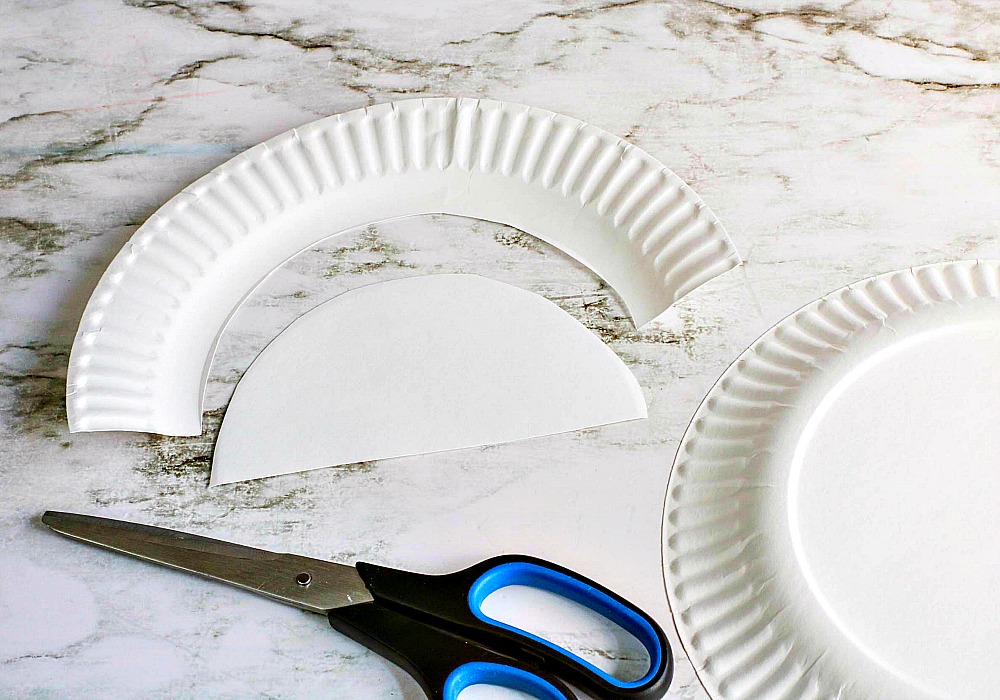
- Cut one paper plate in half. Trim one half of the paper plate to just the inner circle, discarding the other pieces of the paper plate.
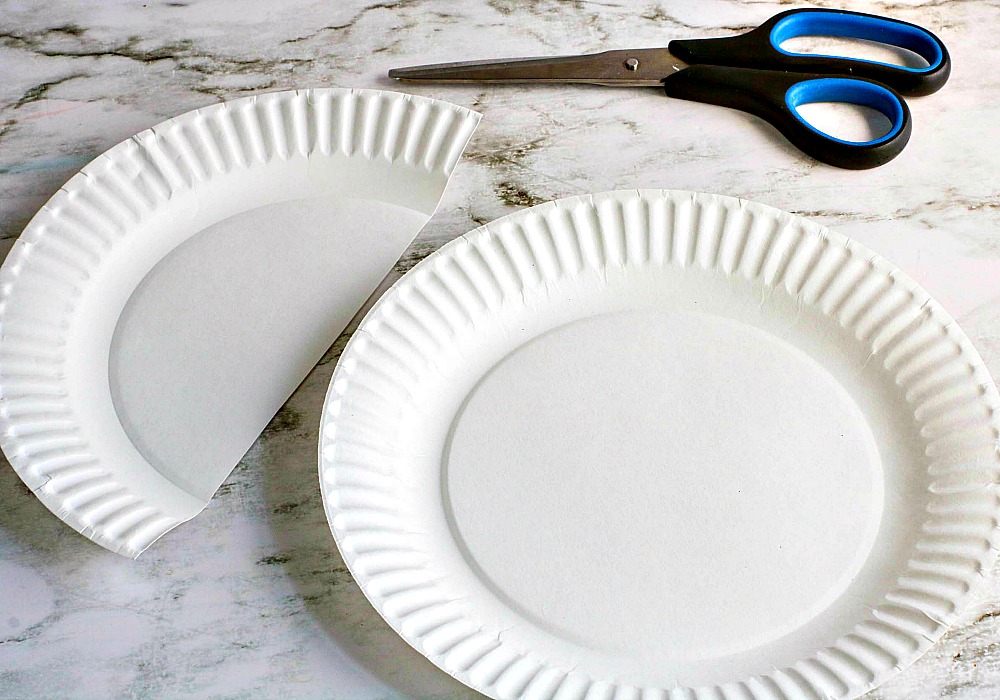
It should look like this when you are done cutting.
Turn both the full plate and half plate over. This way BB8 will have a spherical look to him once you finish putting on all his robot parts.

3. Decorate the paper plates by attaching pieces with glue. There is really no right or wrong way to decorate BB8. But if you want him to look like the craft example, this is what you will want to do:
Positioning the BB8 parts
- Glue one orange circle at the top right of the main paper plate. Then place one orange circle at the left center edge of the plate. Glue the third orange circle near the bottom right edge of the paper plate.
- Position the grey robot part pieces so they fit inside the three orange circles. You will notice that a number of the grey pieces fit perfectly inside the nooks and crannies of the orange circles.
- Glue the small grey circles (the circles that look like washers) in a line starting from the top left center of the main paper plate to the center of the plate. Then, the line branches off to the right and left and extends to the edge of the pate.
- For BB8’s head, glue the bigger black circle (his eye) in the center of the paper plate half.
- Glue the smaller black circle just below and to the right of the bigger circle, but not quite to the edge.
- Glue one long grey rectangle to the bottom edge of the paper plate half. The less long, slightly wider grey rectangle should be glued at the top of the paper plate half, just above the big black eye.
- The two orange rectangles should be glued just on top of the long grey bar. The orange rectangle on the right might need to be glued under the smaller black circle.
- Finally, glue the six small orange squares just under the grey bar at the top of the paper plate half– three to the right and three to the left of the big black eye.
- Glue the two paper plates together at the edge.
- Glue or tape the paper plate to the popsicle stick if desired.
- Allow the craft to dry completely before playing or displaying.