How To Make Crystal Rainbows
How To Make Crystal Rainbows
This is an excellent tutorial on how to make crystal rainbows. Such a fun science experiment for kids!
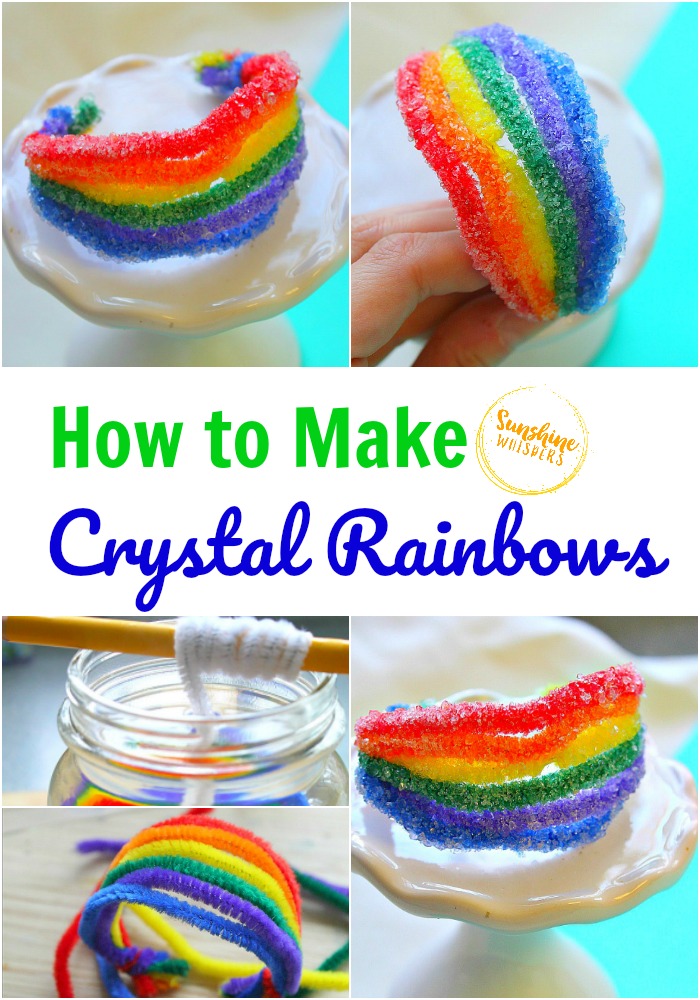
Science is so much fun for kids. And your kids will go crazy for this fun rainbow-themed science experiment. The entire experiment is easy to set up. It explores how crystals form and the result is a gorgeous rainbow craft!
Check out the tutorial below! And you don’t have to be a teacher to have fun with this science experiment. It’s really simple enough that parents can easily do this with kids!
Sunshine Whispers participates in the Amazon Associates and Amazon Influencer Programs. As an Amazon Associate we earn from qualifying purchases. We may earn money or products from the companies mentioned on this site and in this post.
What you will need
- water
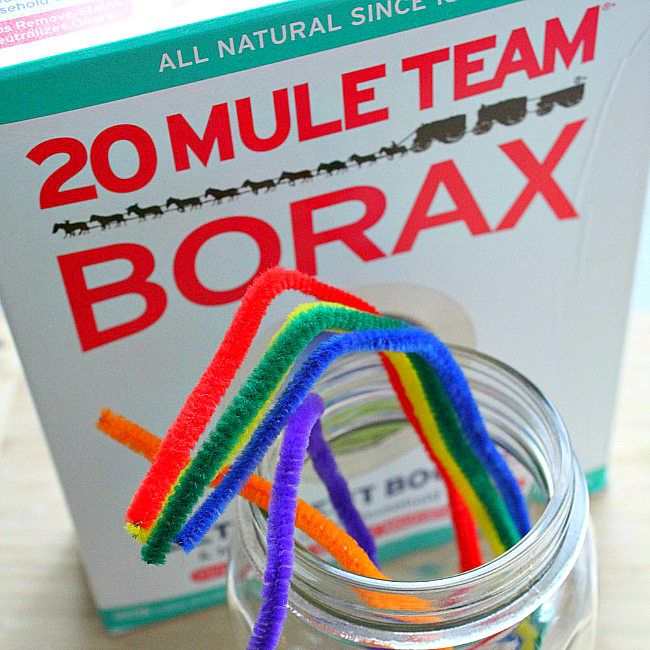
- Borax powder
- pipe cleaners in red, orange, yellow, green. blue, purple
- string or additional pipe cleaners
- glass jar (mason jars work great!)
- pencil or chopstick
- cooking pot
- spoon
How To Make the Crystal Rainbow
- Start by creating the pipe cleaner rainbow. Line up your pipe cleaners in rainbow order: red, orange, yellow, green, blue, purple.
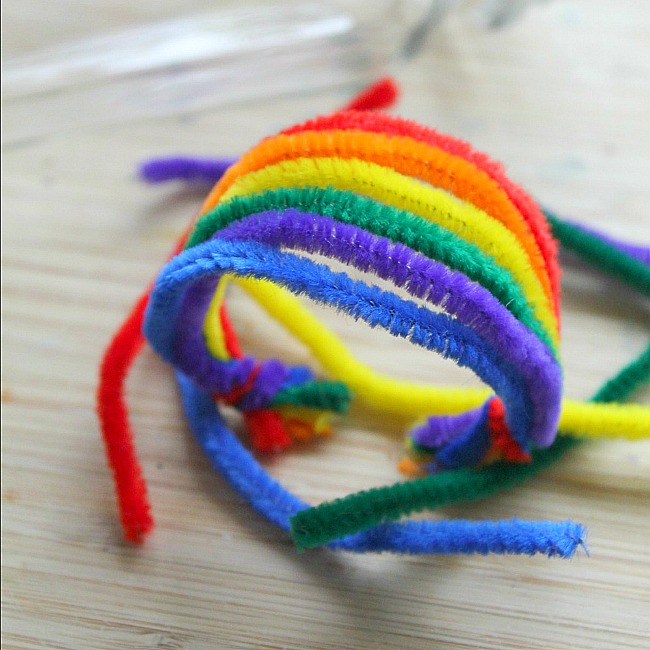
- Tie the ends of the pipe cleaners together to create a rainbow band. Gently fold to create an arch.
- Bring 2 cups of water to a boil.
- Add in 1/4 cup of Borax powder and stir until dissolved. Stir well and remove from heat.
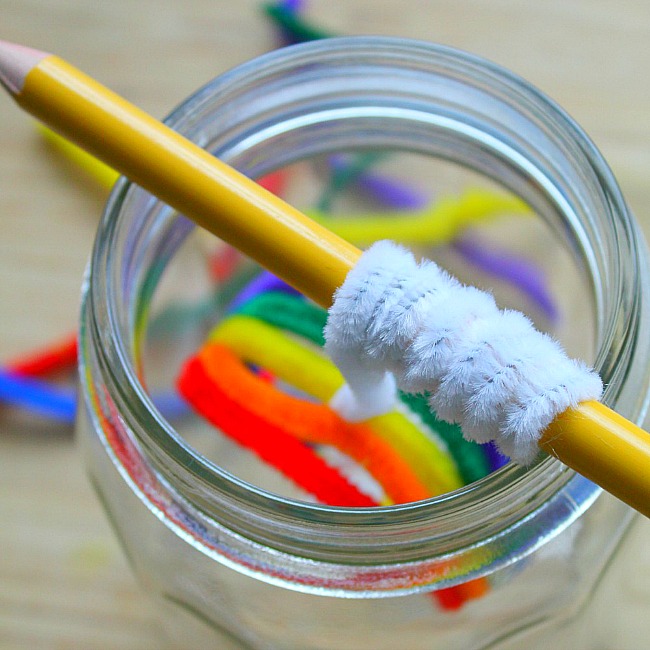
- Tie some string or an additional pipe cleaner to the rainbow. Tie the opposite end to a pencil or chopstick.
-
Place the pencil over the mouth of the jar and let the rainbow drop into the jar.
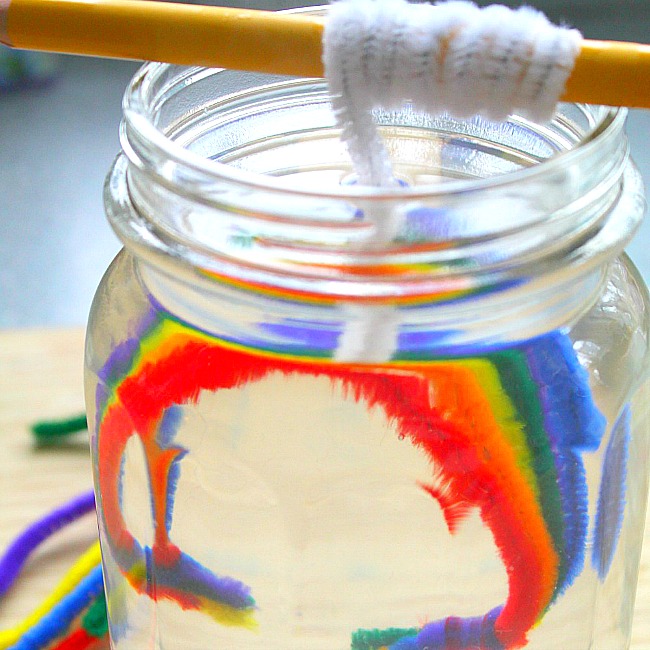
7. Carefully fill the jar with the hot water and Borax mixture. Make sure the jar is filled to the top.
8. Allow the rainbow to sit undisturbed for 24-48 hours. You will notice the crystals start to form after one day.
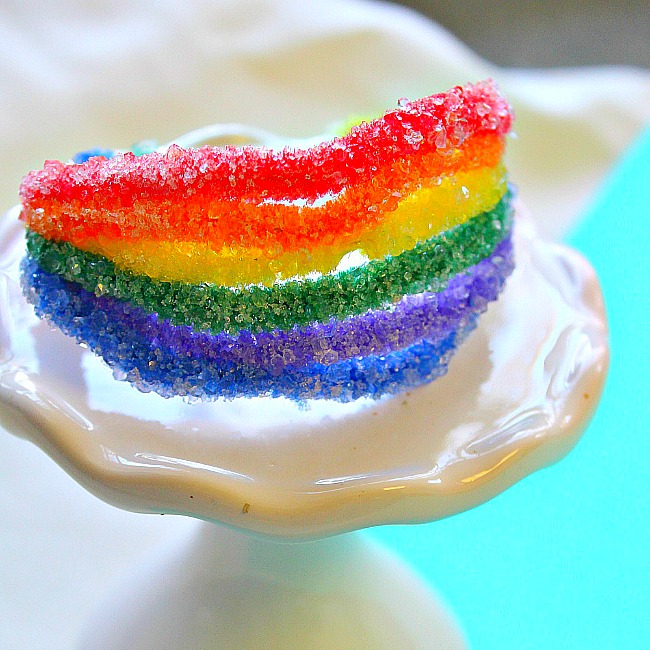
9. Remove from the jar and cut away the string. Allow the rainbow to dry.
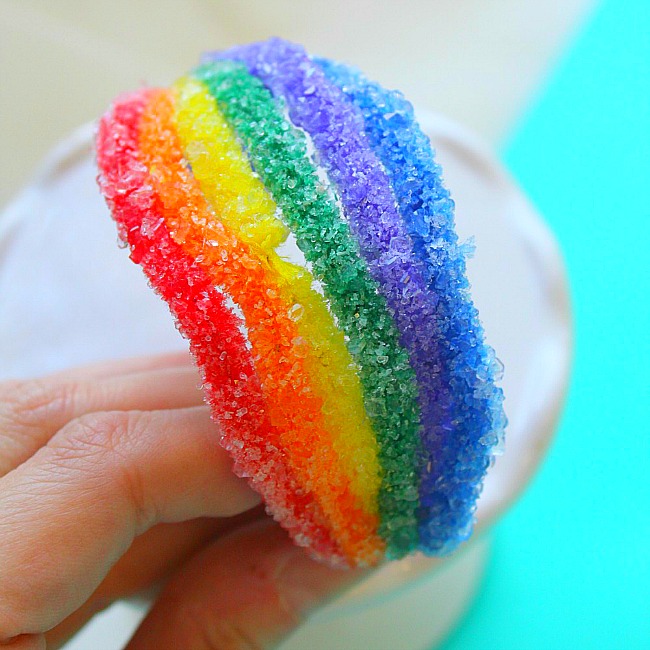
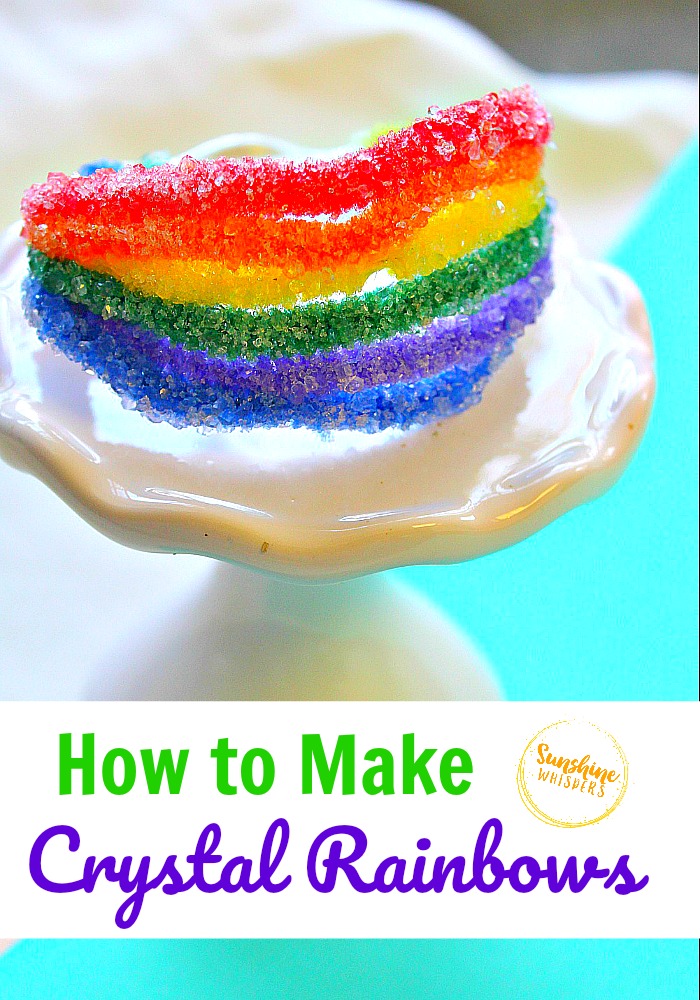
Your crystal rainbow is now ready to be displayed.
Check out these fun rainbow crafts and activities too!
- Dollar Store Cloud and Rainbow Craft Stick Craft
- Rainbow Pancake and Fruit Skewers
- Rainbow Slime!
- Unicorn Paper Plate Rainbow Craft For Kids
- Cereal and Marshmallow Rainbow Necklace
- Rainbow Ribbon Craft