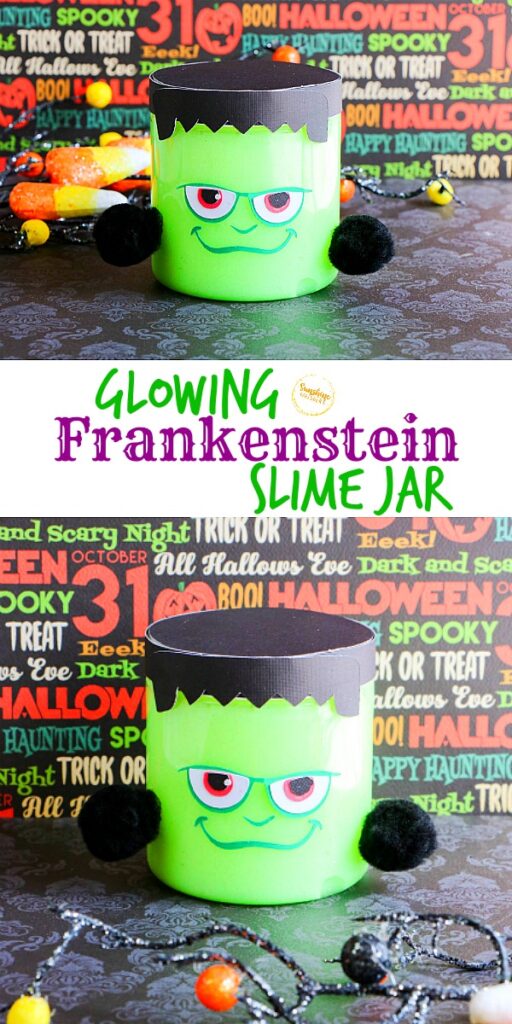
Glowing Frankenstein Slime Jar
Glowing Frankenstein Slime Jar
Check out this glowing Frankenstein Slime Jar this Halloween season. A fantastically fun sensory activity for kids!
This Halloween, why not play mad scientist and make this cute Frankenstein come to life! This glowing Frankenstein slime activity is perfect for kids who love Halloween and love sensory activities. Oh ok.. anyone who loves slime will love this!
The best part is this slime is glow in the dark! Yep! It’s really super easy to make too.. so you can whip up a batch in no time for your kids to play with. Or, if you are hosting a Halloween party, you could make a bunch of these jars to give away as prizes or party favors! Glowing Frankenstein Slime Jars are really fun for the season!
Sunshine Whispers participates in the Amazon Associates and Amazon Influencer Programs. As an Amazon Associate we earn from qualifying purchases. We may earn money or products from the companies mentioned on this site and in this post.

What you will need:

- 1 (8 ounce) plastic storage jar (these ones are the perfect size)
- 2 (6 ounce) bottles Elmer’s Glue in glow in the dark green (You only need about 1 ½ bottles)
- About ¼ cup warm water
- ½ teaspoon baking soda
- 1½ tablespoon contact lens solution (containing boric acid) or this great slime activator!
For the jar, you will also need:
- black cardstock or construction paper, 1 sheet
- red cardstock or construction paper, 1 sheet
- white cardstock or construction paper, 1 sheet
- 2 black 1-inch pom poms
- Glue stick, glue dots, or hot glue
- FREE Template (click to download)
To make slime:
1. Empty the glue into a large bowl.
2. Fill the empty glue bottles about ⅓ full with warm water (about ¼ cup) and seal with the lid. Shake well to combine the remaining glue with the water. Pour into the bowl with glue and stir to combine.
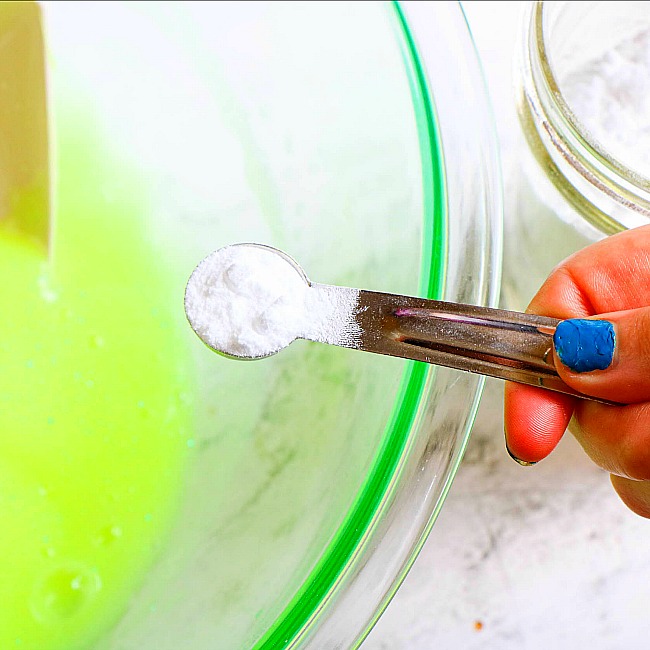
3. Add the baking soda to the glue and stir to mix thoroughly.
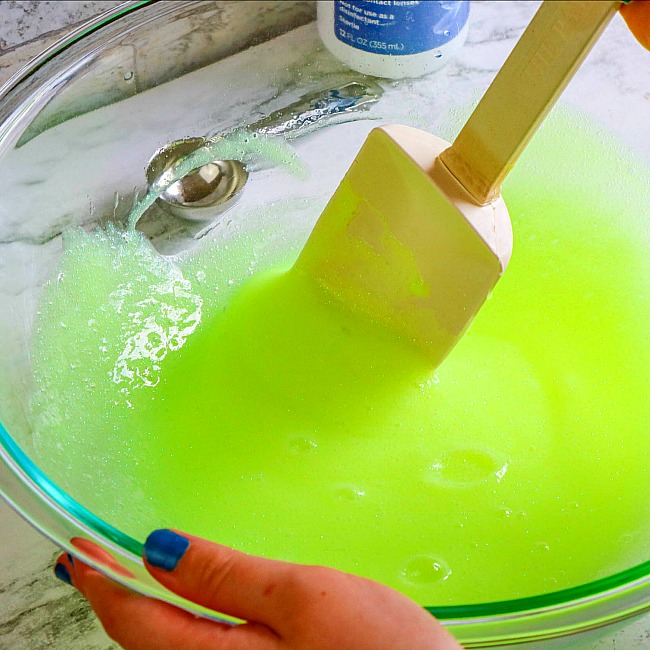
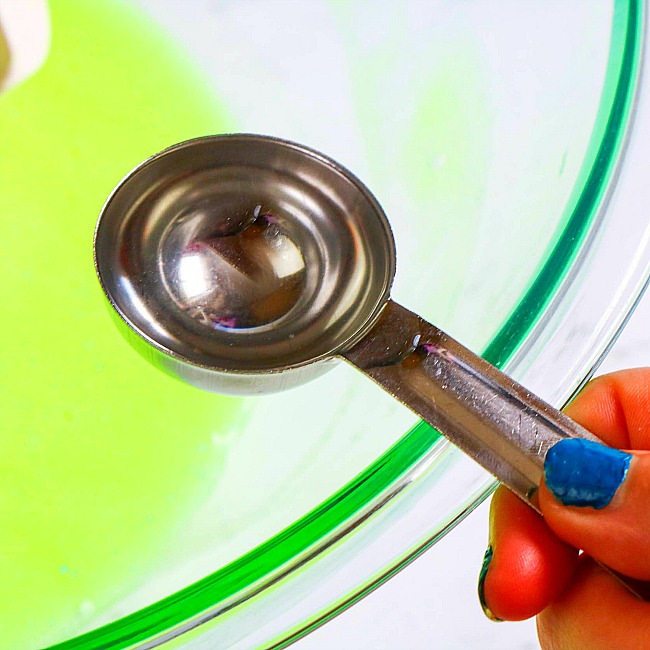
4. Add contact lens solution to the glue mixture and stir well until the slime becomes a ball.
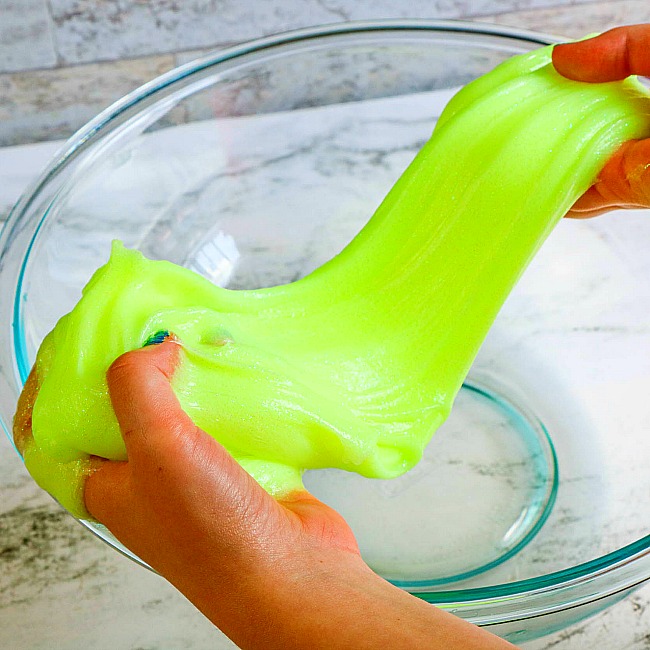
5. The slime will be sticky. Begin to play with the slime, kneading it as you would bread dough, to bring the slime together. The slime is ready when it is no longer sticky.
6. Best if stored in an airtight container in the refrigerator when not in use.
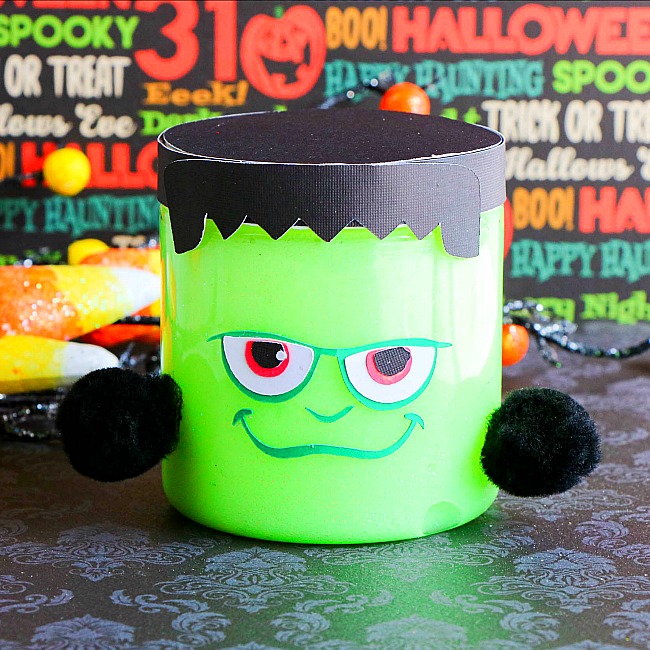
To create the jar:
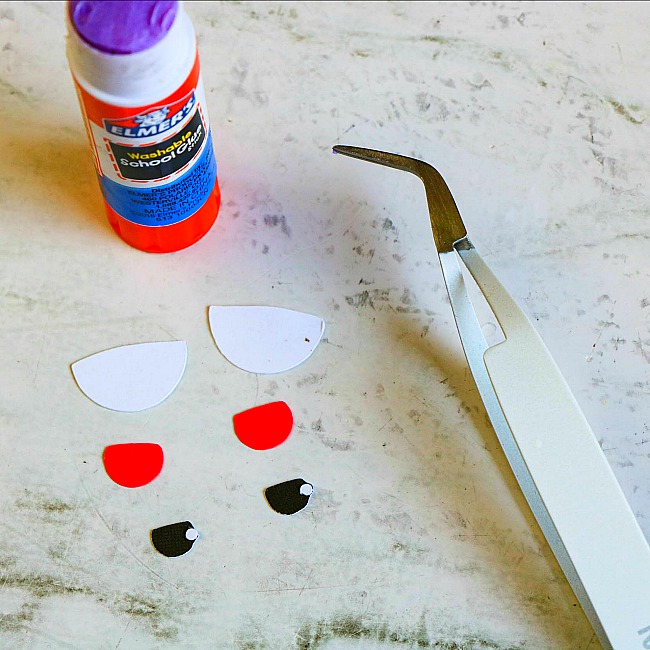
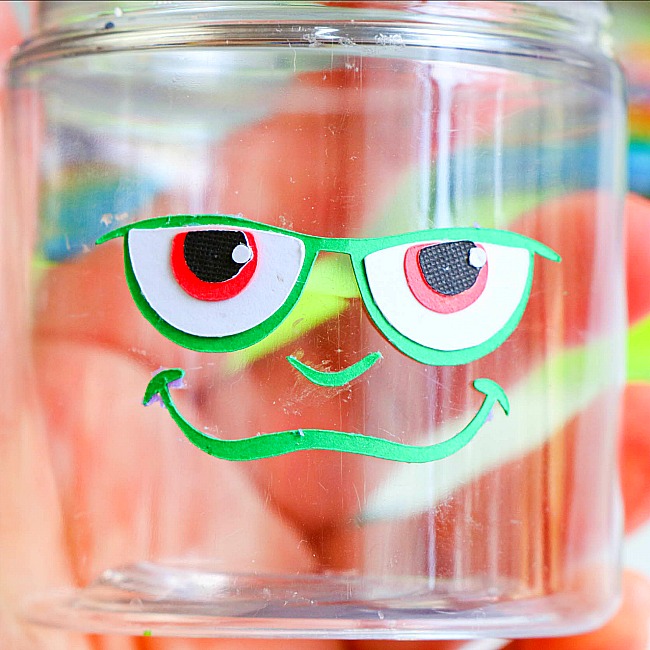
1. Cut the templates from the designated colors. Print out the template and either use the printed colors as shown. Or, use the template to trace onto the color you want (so, red for the blood shot eyes).
2. Trace the circumference of the lid on a piece of black construction paper. Cut it out. Glue to the top of the lid.
3. Cut a strip from the black construction paper that is ½ inch by 9 inches. Attach this to the rim of the lid using glue.
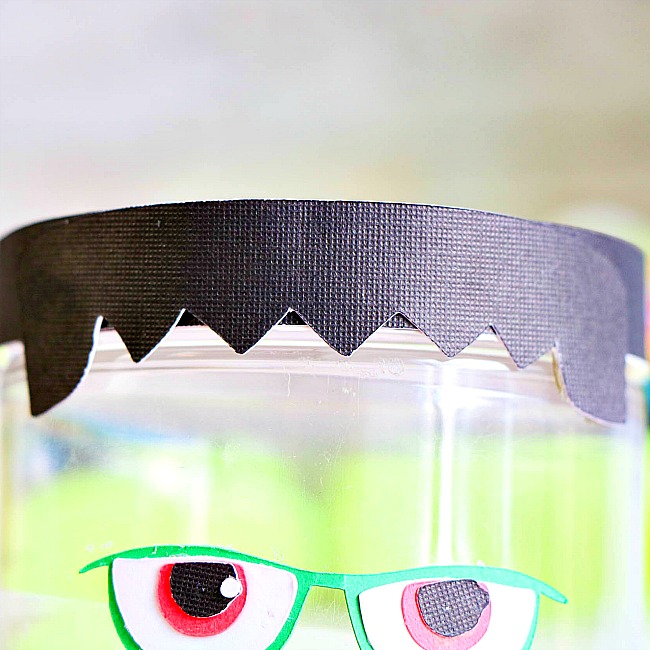
4. Cut a strip from the black construction paper that is ½ inch by 9 inches. Attach this to the rim of the lid using glue.
5. Attach the facial features to the jar as well as the hair to the lid.
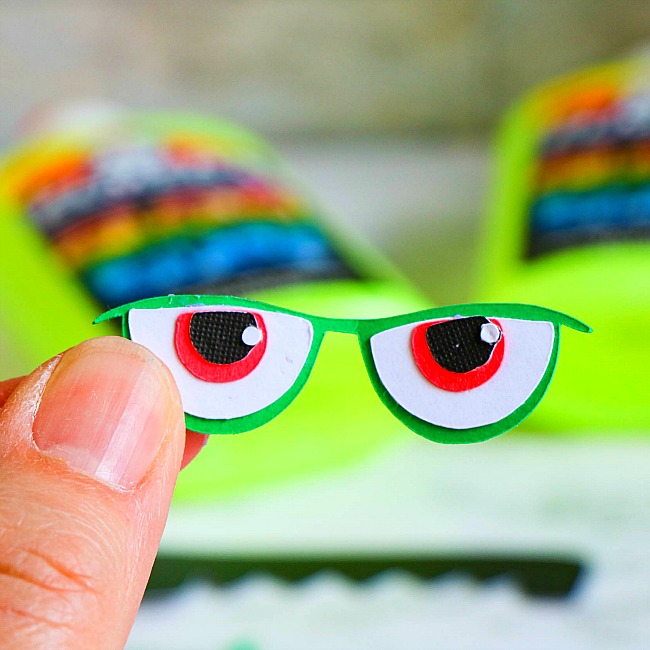 For the facial features, use a glue stick to assemble the eyes. It’s easier to start with the whites of the eyes. Glue the red eye outline onto the white, then add the black pupil. Finally, glue on the white speck. You may need to use tweezers (or craft tweezers) in order to assemble these eyes.
6. Attach Frankenstein’s neck bolts (the pom poms) to the side of the slime jar with glue.

7. Put as much slime as will fit into the jar and seal to close.
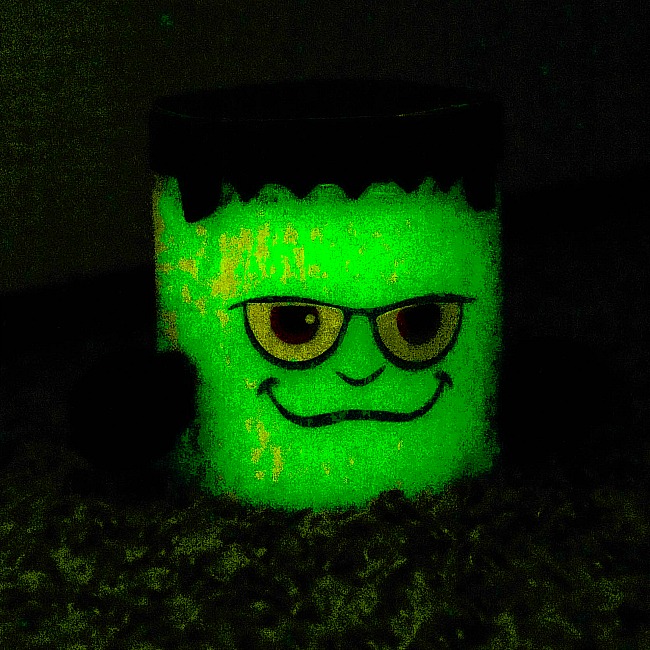
Don’t forget to check out this creepy slime at night!
If you like this Frankenstein Slime, Check Out These Halloween Themed Science activities Too!
- Spooky Science Experiments for Kids
- Glowing Jack-O-Lantern Slime Jar
- Apple Volcano Science Experiment
- Witch’s Brew Science Experiment
- Pumpkin Volcano Science Experiment
- Vampire Blood Slime
- Oozing Eyes Slime
- 20 Candy Science Experiments
- Apple and Pumpkin Science Experiments