Dollar Store Mickey And Minnie Pumpkin Craft For Kids
Dollar Store Mickey And Minnie Pumpkin Craft For Kids
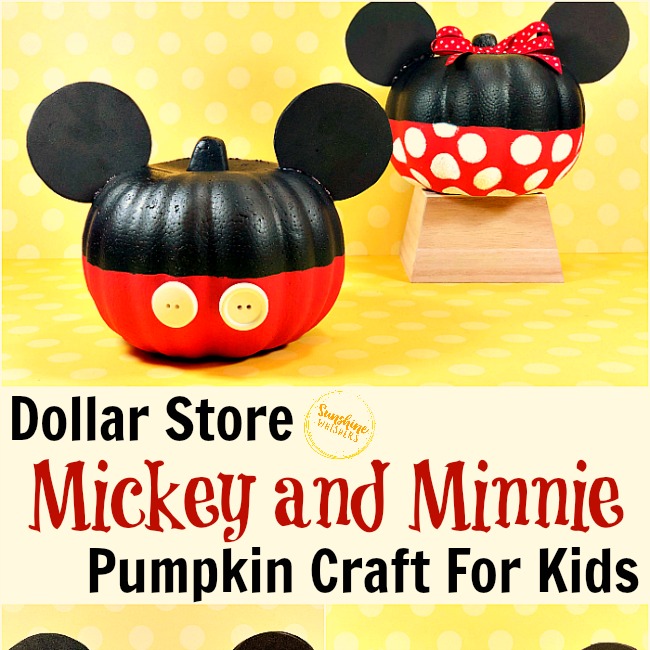
This super cute Mickey and Minnie Pumpkin Craft for Kids uses Dollar Store foam pumpkins. It is really so adorable and fun to make this Halloween!
Don’t you just love all the fun treasures you can find at the Dollar Store? With a little creativity and a very little amount of money, you can create super cute and fun craft projects with your kids.
Transform a Dollar Store neon orange foam pumpkins into everyone’s favorite mice, Mickey and Minnie! This Mickey and Minnie Pumpkin Craft is perfect for kids and Halloween.
And.. hello? Disney? Disney crafts are fantastic anytime but especially if you are planning a family vacation to Disney World!

What will you need?
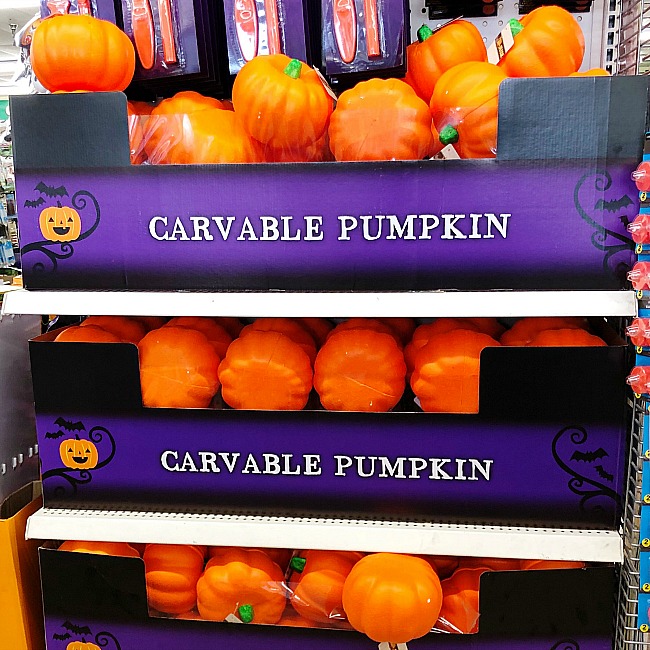
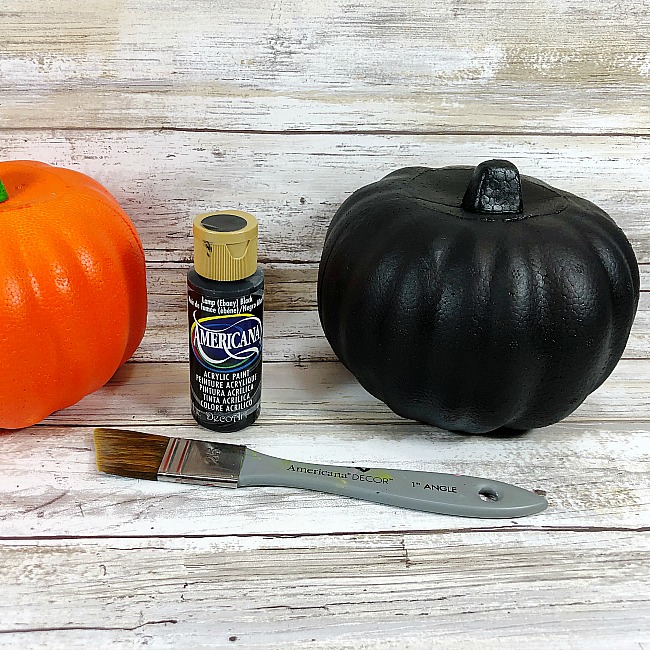
- Dollar Store Foam Pumpkins – Two
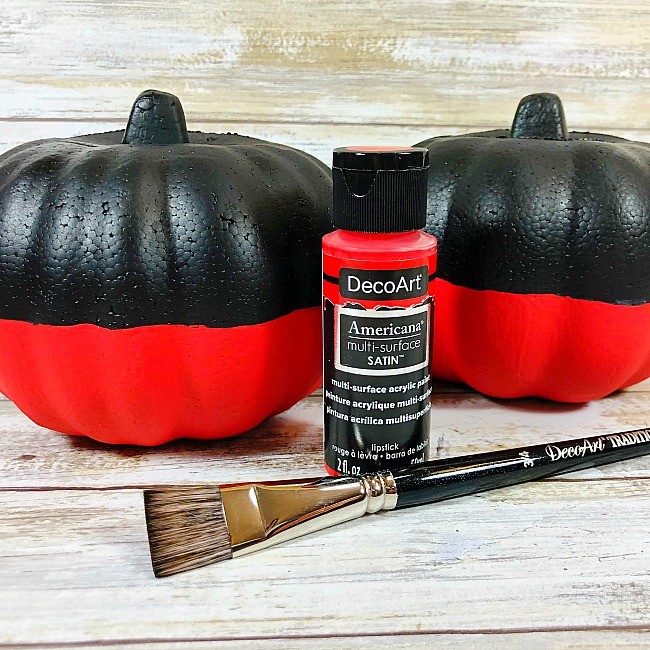
- Acrylic Craft Paint – Black, Red and White
- Black Craft Foam
- Buttons – White; Two
- Ribbon – Red with White Polka Dots
- Paintbrush
- Round Sponge Applicator
- Circle Template – 2 ½” diameter
- Liquid Glue
- Glue Gun and Glue Sticks
- Scissors
- Permanent Marker – Black
How to Make the Mickey and Minnie Pumpkin Craft
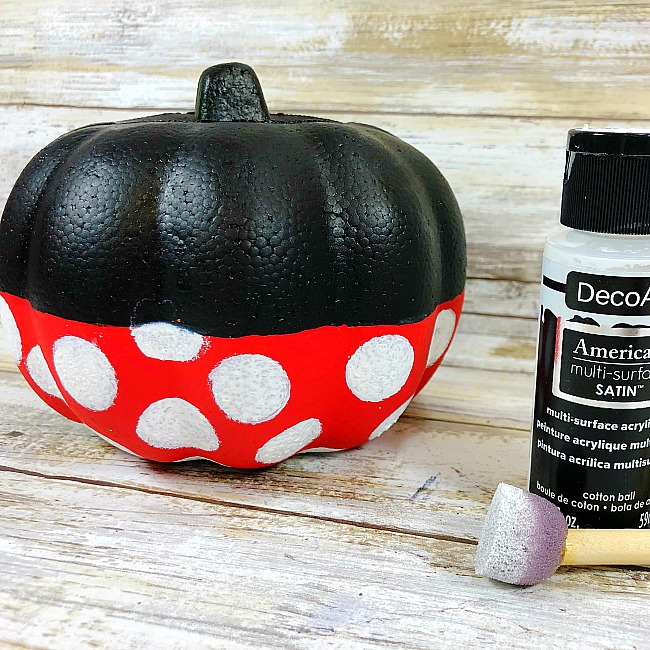
1. Base coat paint the pumpkin with black craft paint, let dry. Apply a second and third coat, if necessary, letting each coat dry completely.
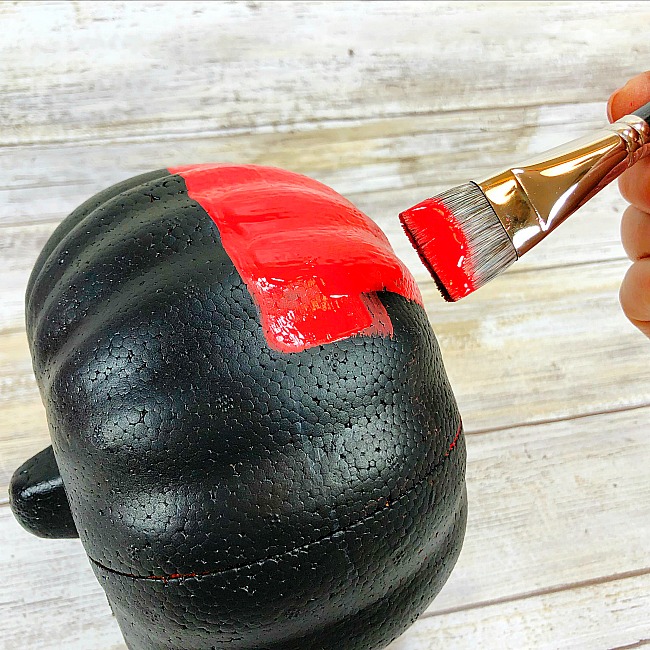
2. Paint bottom half of each pumpkin with red craft paint, let dry. Apply a second coat, if necessary.
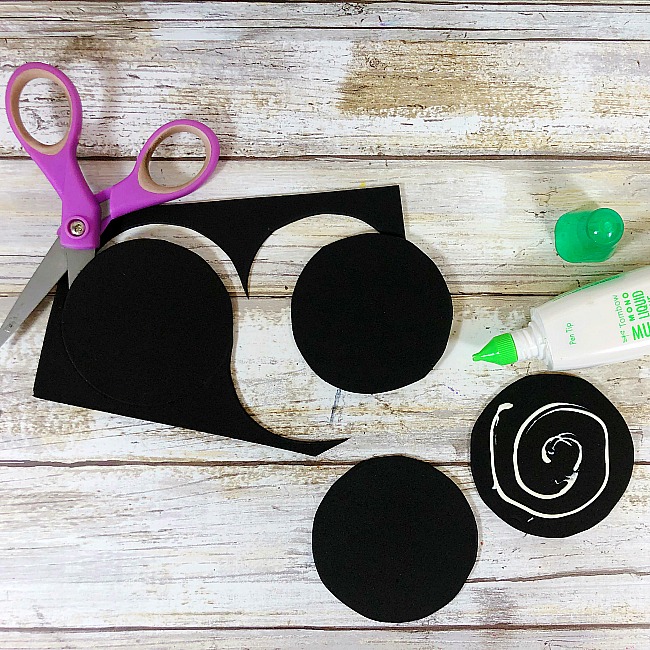
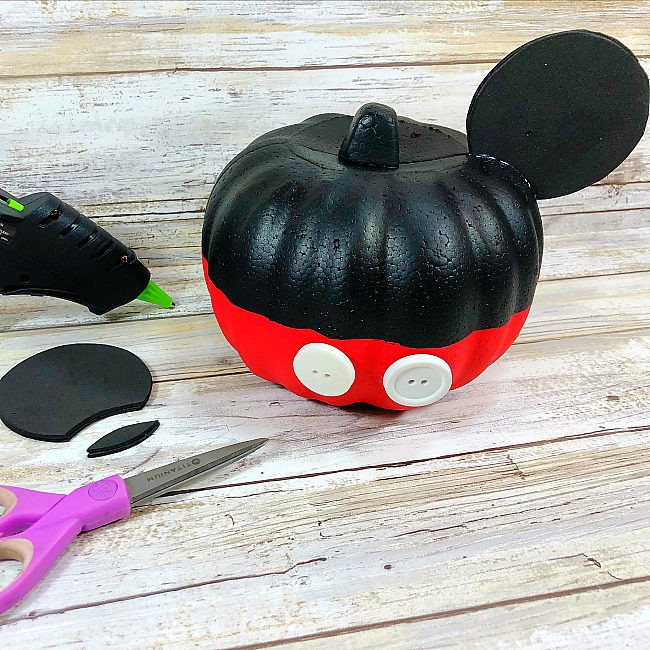
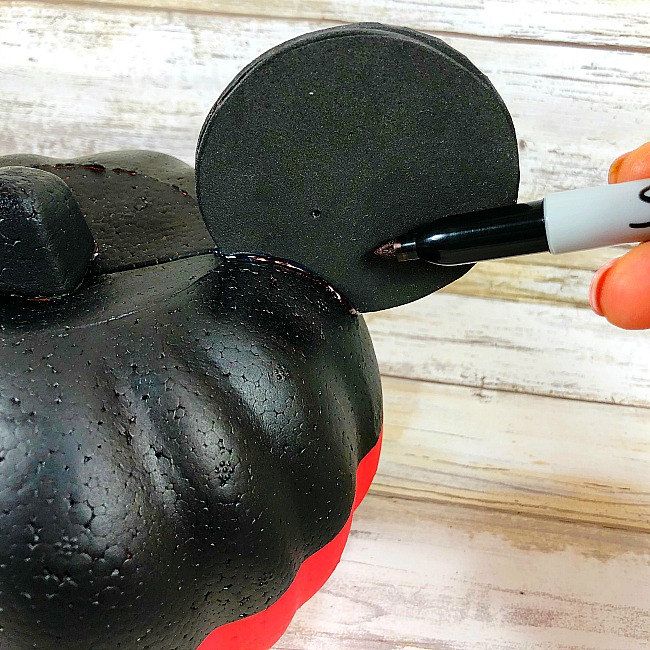
3. Trace eight circles 2 ½” in diameter onto black craft foam with a permanent black marker. Cut out with scissors, making sure to cut on the inside of your lines for a clean finished project. Attach two circles together with liquid glue to create four ears total. Set aside to dry.
4. Create polka dots on the Minnie pumpkin with round sponge applicator and white craft paint, let dry.
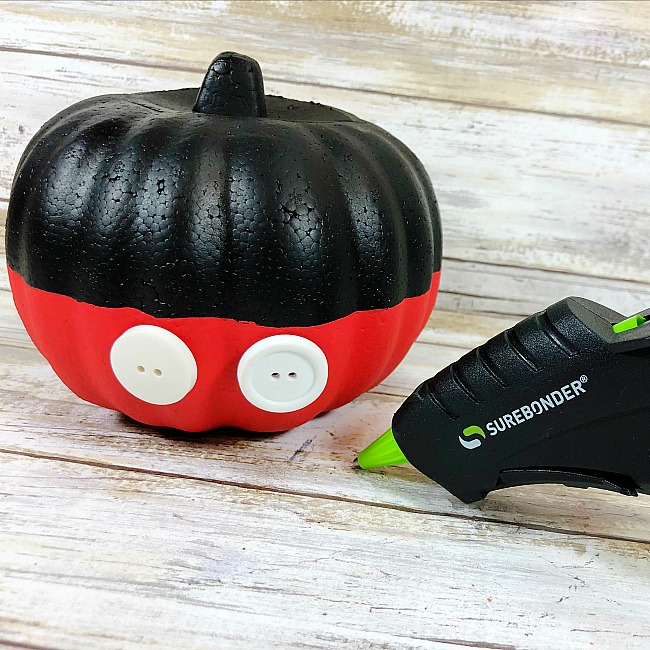
5. Attach buttons to the Mickey pumpkin with glue gun.
6. Trim a small sliver off the bottom of each ear. Apply ears to the top right and top left of each pumpkin with glue gun pushing the ear toward the pumpkin as the glue sets to get a good adhesion.
7. Create the bow by wrapping ribbon around all four of your fingers three times. Carefully remove ribbon from your fingers and tie in the center with a separate 12” length of ribbon to create the tail ends.
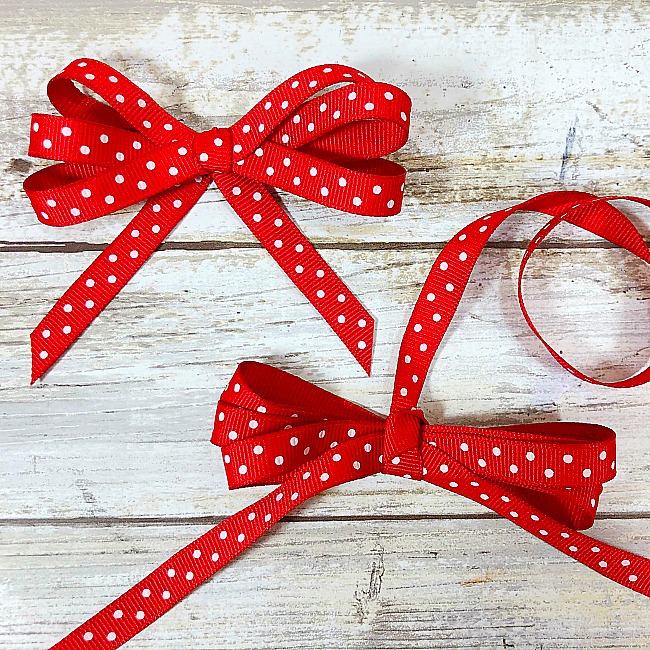
8. Attach bow to the top center of the Minnie pumpkin with glue gun and then fluff bow loops and trim tails end to prevent fraying.

9. If the glue shows at the base of the ears, cover with permanent black marker.
A great craft project to create for your favorite Disney lover! The Mickey and Minnie pumpkins go together in 30 minutes (for both) so create one set to keep and one set to gift in just about an hour!
More Halloween Craft for Kids ideas to try!
- Dollar Store Pumpkin Craft
- Dollar Store Googly Eye No Carve Pumpkin Craft for Kids
- No Sew Bat Craft for Kids
- No Sew Ghost Craft for Kids
- Pumpkins on a Fence
- Spooky Spider Paper Plate Craft
- Bat Crafts for Kids!
Want more Halloween family friendly fun inspiration? Check these ideas out!
- Disney Princess Halloween Costume Ideas
- Book Character Costume Ideas
- Best Pumpkin Carving Tips For An Awesome Halloween
- 15 Family Friendly Halloween Movies
- 10 Fun Halloween Traditions To Start With Your Family